Initial deployment
Use deploy:init to create Cloudflare resources, save production settings, and deploy to workers.dev.
For the initial deployment, you do not need to create D1 databases, KV namespaces, R2 buckets, or queues manually, or fill in resource IDs in wrangler.jsonc yourself. The project's deploy:init checks the target account and resource names, then completes initialization after your confirmation.
Prepare for deployment
Before starting, confirm that:
- Your Cloudflare login is verified and R2 is enabled in the account you will deploy to.
- You have decided whether to use official Turnstile test keys temporarily or the Site Key and Secret Key from a production widget.
- If Resend is still the default email service, you have a Resend API key ready.
- You have chosen sender and support email addresses.
- If you plan to enable Stripe now, you have a connection ID, Secret Key, and webhook secret ready.
If you only have a Cloudflare workers.dev address, you can start with the template's Turnstile test keys. After choosing a production domain, create a widget, replace the keys in .env.production, and redeploy. See Configure Turnstile for the full process. You do not need to register for Stripe, OAuth, or notification services just to deploy if they are not enabled.
Remote settings belong in .env.production
.env remains for local development. Enter remote Turnstile, Resend, and Stripe settings during the deploy:init prompts to save them in .env.production. Turnstile test keys also belong here. Using test values does not mean remote deployment should read the local .env. Neither file is committed to Git.
Sign in to Cloudflare
From the project root, run:
npx wrangler loginThe browser opens Cloudflare's authorization page.
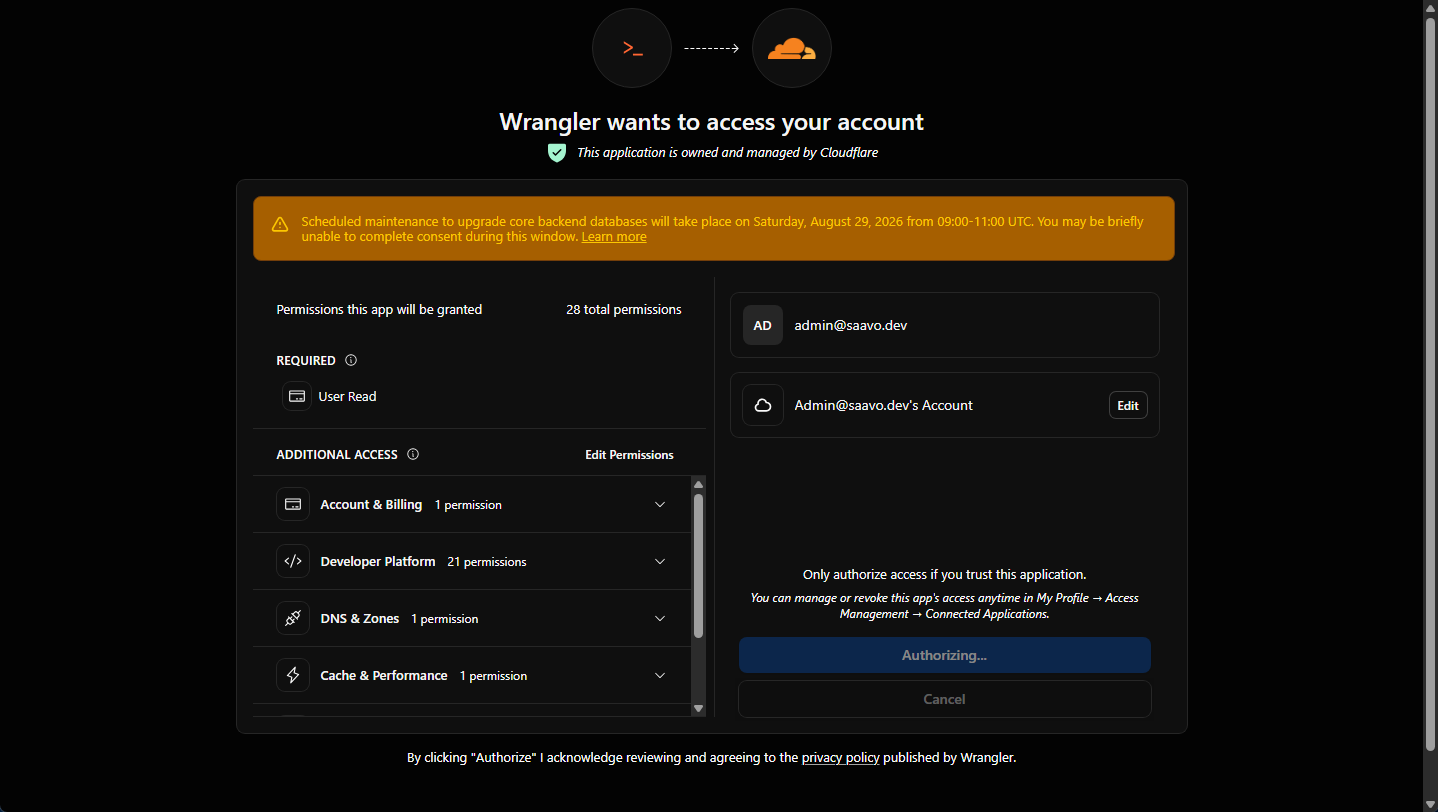
Confirm that the signed-in user can access the deployment account, then allow Wrangler access. After authorization, you can check with:
npx wrangler whoamiThe terminal shows the currently authorized account information and permissions:
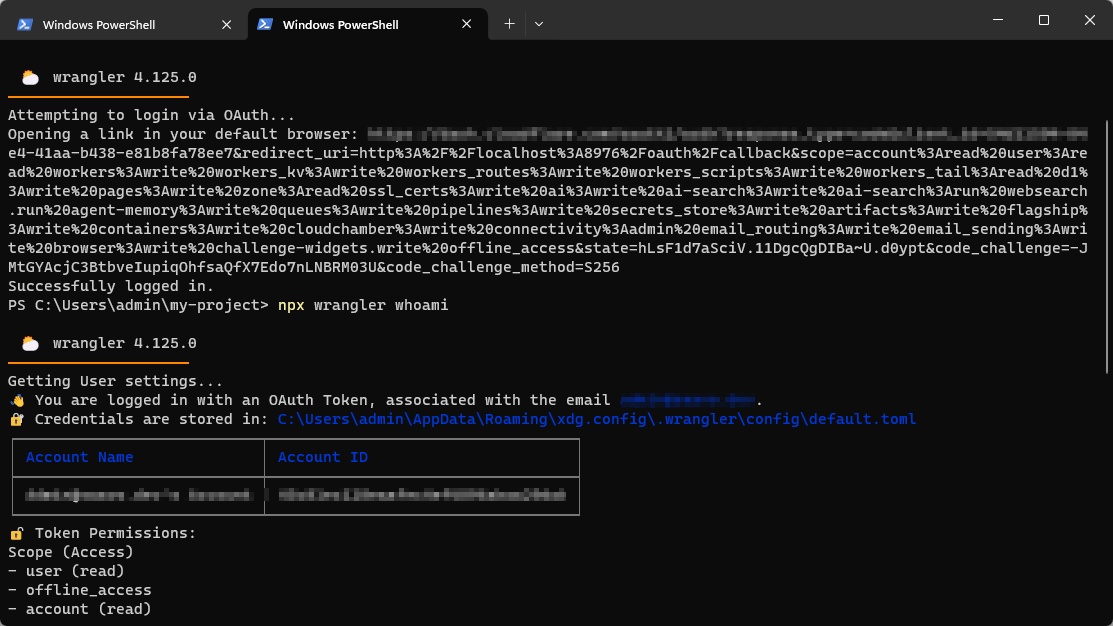
If multiple accounts appear, note which one this project should use. deploy:init will ask you to select it in the terminal.
Run the initial deployment
Run:
npm run deploy:initFollow the terminal prompts in order:
- Select the Cloudflare account.
- Confirm the Worker name and resource names derived from it.
- Enter a matching Turnstile Site Key and Secret Key. You can use the official test pair to verify the initial deployment.
- Confirm the sender and support email addresses.
- Enter
RESEND_API_KEYif using the default Resend provider. - Choose whether to configure Stripe now.
- Confirm writing to
.env.production. - Review the Worker, D1 databases, KV namespaces, R2 buckets, and queues to be created, then confirm to start deployment.
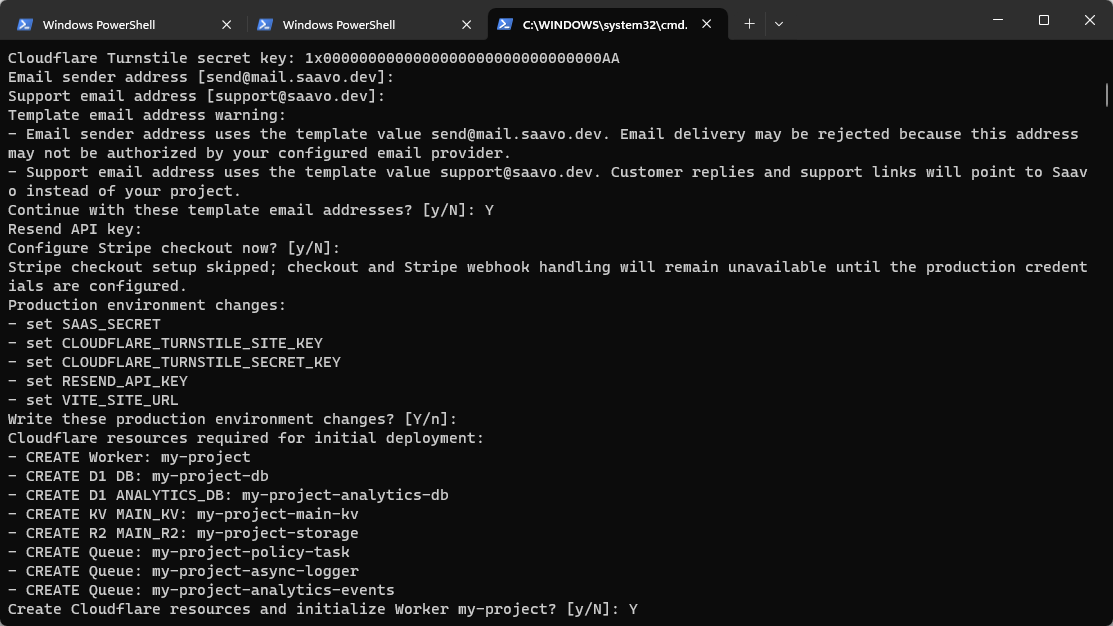
The script does not reuse or overwrite existing resources with the same names. If it detects a name conflict, it stops and identifies the conflict. Do not arbitrarily delete resources in your Cloudflare account just to continue before confirming who owns them.
After confirmation, the script automatically runs type checking and a production build, creates and binds Cloudflare resources, deploys the Worker, migrates the remote databases, synchronizes KV, and checks the homepage and enabled content pages.
After a successful deployment, the terminal prints an address like:
https://my-project.<your-workers-dev-subdomain>.workers.dev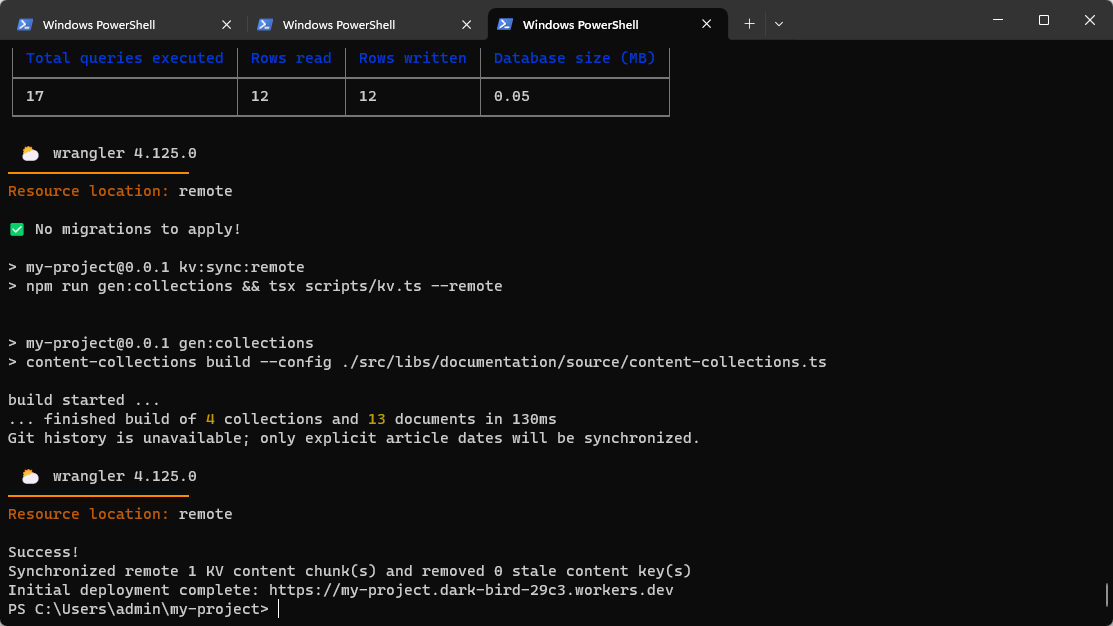
Open this address and confirm that the homepage and /docs are accessible.
With the official test pair, you can continue checking that registration and other forms work, but it does not detect real bots. With a production widget, also confirm that its hostname list includes the actual hostname in the browser's address bar.
Resume after an interruption
If you exit during configuration checks before any remote resources are created, fix the issues reported in the terminal and rerun:
npm run deploy:initIf the Worker or some resources already exist, check the remote state and local bindings before proceeding. Do not immediately repeat initialization. For failures during database migration, KV synchronization, or health checks, follow Recover from an interrupted deployment.
After a successful initial deployment, the project has recorded its Cloudflare account, resource IDs, and production environment. For subsequent code or .env.production changes, use:
npm run deploy:updateDo not repeatedly run deploy:init on an initialized project or bypass the project scripts to maintain a separate set of Wrangler secrets.
Use a custom domain
The initial deployment must complete on workers.dev first. When you are ready to switch to a production domain already managed in Cloudflare, run:
npm run domain:set -- https://app.example.comThe command updates the site URL and Worker Custom Domain, then validates and deploys the project again. Before switching domains, we recommend creating a production Turnstile widget and writing its real keys to .env.production, so domain:set deploys with the new keys. If you bind the domain first and replace the keys later, update .env.production and run npm run deploy:update afterward.
After switching domains, also update the sending domain in Resend, OAuth callback URLs, and the Stripe webhook. The terminal prints the callback URLs for the current project. Copy each to the corresponding service's dashboard.
The project has now completed its first full deployment from a Saavo template to Cloudflare. Continue to the tutorial to customize the product content. When you are ready for real users, complete the checks in Deployment.