Create the project and configure branding
Create a Saavo project, initialize it locally, and configure the website copy and theme colors.
The previous article established the product scope and technical approach. In this article, you will create the actual Saavo project, run it locally, and configure the website copy and theme colors.
Create the WebpageToPDF project
Once the prototype has been validated, you can create the actual project with Saavo.
The prototype stage focused on validating the features and approach. To start development, first prepare your environment, then gradually migrate the validated features into the Saavo template.
This tutorial uses Windows, PowerShell as the terminal, and Cursor and Codex as development tools. The remaining demonstrations use this environment.
These are my personal tool choices, not Saavo requirements. If you already have a preferred editor or AI coding tool, you can keep using it. There is no need to switch just to follow the tutorial.
Prepare accounts and the development environment
The Prerequisites section covers the steps in detail. If you are starting with this tutorial, check the following first:
- Saavo account and template access: Complete Sign up and purchase. After purchasing, you can find Saavo Starter under “My Products” on your account page. When authorizing the CLI later, you must sign in with the account that has template access.
- Git: Follow Install Git. Git records your code changes and makes it easier to review exactly what AI changes later.
- Node.js and npm: Follow Install Node.js. The current CLI and template require Node.js
22.13.0or later. Install Node.js 24 LTS as described in the prerequisites. npm is included. - Cloudflare account: This project will eventually run on Cloudflare. Follow Create a Cloudflare account to sign up, verify your email address, and enable R2. Running the Saavo template locally does not require remote resources, so you can complete this before deployment. You do not need to create databases, buckets, or queues manually now.
After installation, reopen PowerShell and check that the commands are available:
git --version
node -v
npm -v
All three commands should print a version number. If a command is not found, return to the relevant installation guide to resolve it. If PowerShell blocks execution of npm.ps1, see the instructions on the Node.js installation page. You can use npm.cmd and npx.cmd for now without reinstalling Node.js.
You do not need to configure the domain, email, payments, and third-party sign-in at the outset. I have already registered webpagetopdf.dev, but local development does not depend on a domain. For now, get the template running. Configure the relevant services when you reach email, payment, and deployment features. See Optional services for details.
Install Cursor and Codex
If you want to use the same tools as I do, install Cursor and Codex. Cursor is mainly for viewing and editing code and running terminal commands. Codex is for analyzing the project, writing code, and troubleshooting. Cursor also has AI features, so choose whichever tool suits your workflow for each task.
- Cursor: Open the Cursor download page, choose the desktop version for your operating system, and install it. On first launch, follow the prompts to sign in and complete the basic setup. You can choose whether to import settings from another editor.
- Codex: This tutorial uses the desktop app. Follow the official OpenAI desktop installation instructions to download and install it. Windows users can go directly to the Windows installation page. Sign in with your ChatGPT account and follow the initial setup prompts. Later, you will need to open the local project directory in Codex, rather than just copy code into a chat window.
Accounts for these tools are separate from your Saavo account. After installation, check that the AI features you intend to use work correctly. Available models and usage limits are shown in each account.
Create and initialize the project
Open PowerShell/CMD, go to the parent directory where you want to store the project, and run:
npx saavo-cli@latest create webpagetopdfThis creates a webpagetopdf folder in the current directory. If the prototype project already uses this name, choose another directory to avoid overwriting its code.
On the first run, npx may prompt you to install saavo-cli. Confirm to continue. You do not need to install the CLI globally beforehand.
The Saavo authorization page will open in your browser. Sign in with the account that has template access, review the requested authorization, allow access, and return to the terminal. If the account has access to multiple templates, follow the prompt to select the one for this project.
Once the template has downloaded, the CLI asks whether to prepare the local development environment:
Prepare the project for local development?
Installs dependencies, creates .env, and initializes local databases.
Choose Yes. The CLI installs dependencies, then calls the template's saavo:init to create a local .env, generate SAAS_SECRET and Cloudflare types, initialize the local D1 databases, and finally run doctor to check the configuration. You do not need to repeat these steps. Wrangler is installed with the project dependencies.
When the terminal displays Project is ready for local development, local initialization is complete. If you skipped initialization, or dependency installation or initialization failed partway through, first resolve the issue reported in the terminal. Then enter the downloaded project directory and run:
cd webpagetopdf
npm install
npm run saavo:init
See Create a project for screenshots of the full authorization and initialization process.
Open the project and check that it runs
Open the entire webpagetopdf folder in Cursor, rather than an individual file. Add a local project in Codex and select the same folder. You should see package.json, config/, src/, and AGENTS.md in the root directory.
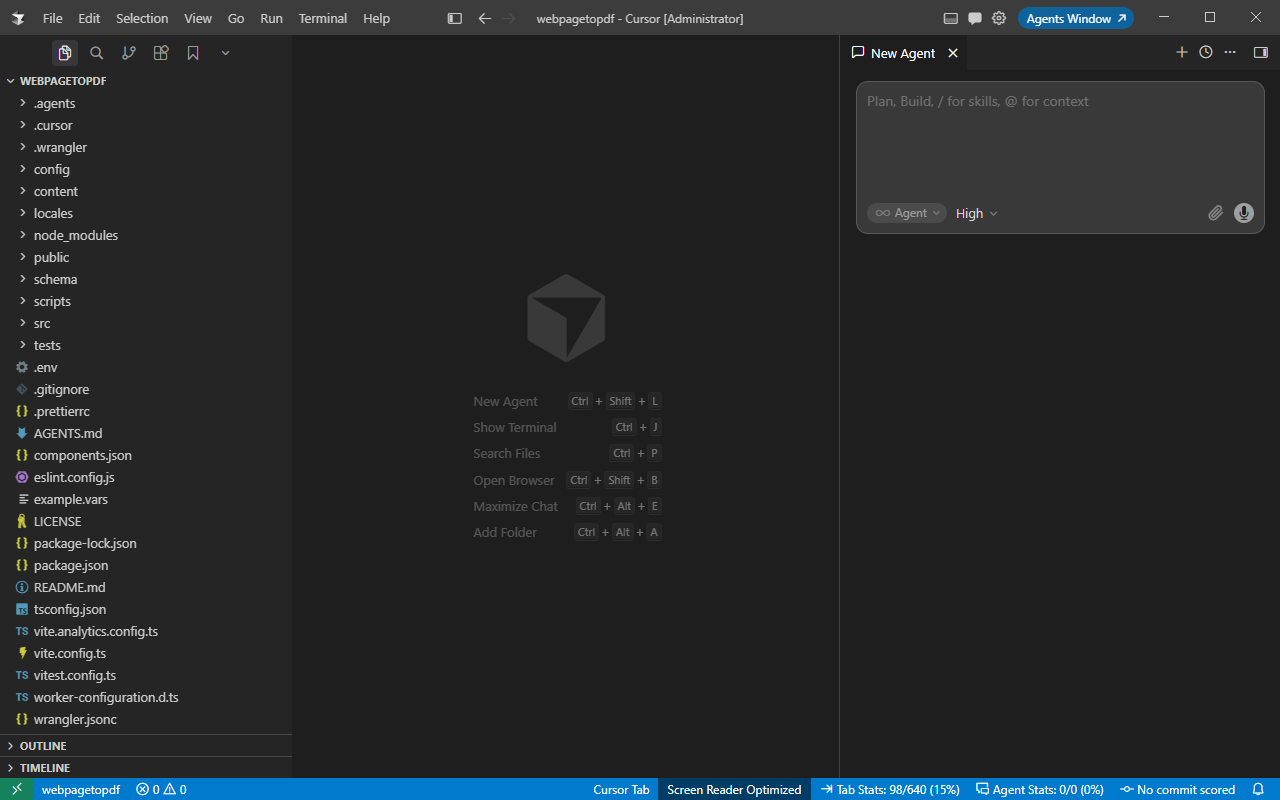
The template includes project rules in AGENTS.md and .cursor/rules/. Do not delete these files when using AI to change code. Cursor and Codex can open the same project at the same time, but avoid editing the same files simultaneously so that changes are not overwritten.
In the Cursor terminal, confirm that the current directory is webpagetopdf, then run:
npm run devOpen the local address shown in the terminal in your browser. Check that the homepage, documentation, sign-in page, and sign-up page are all accessible.
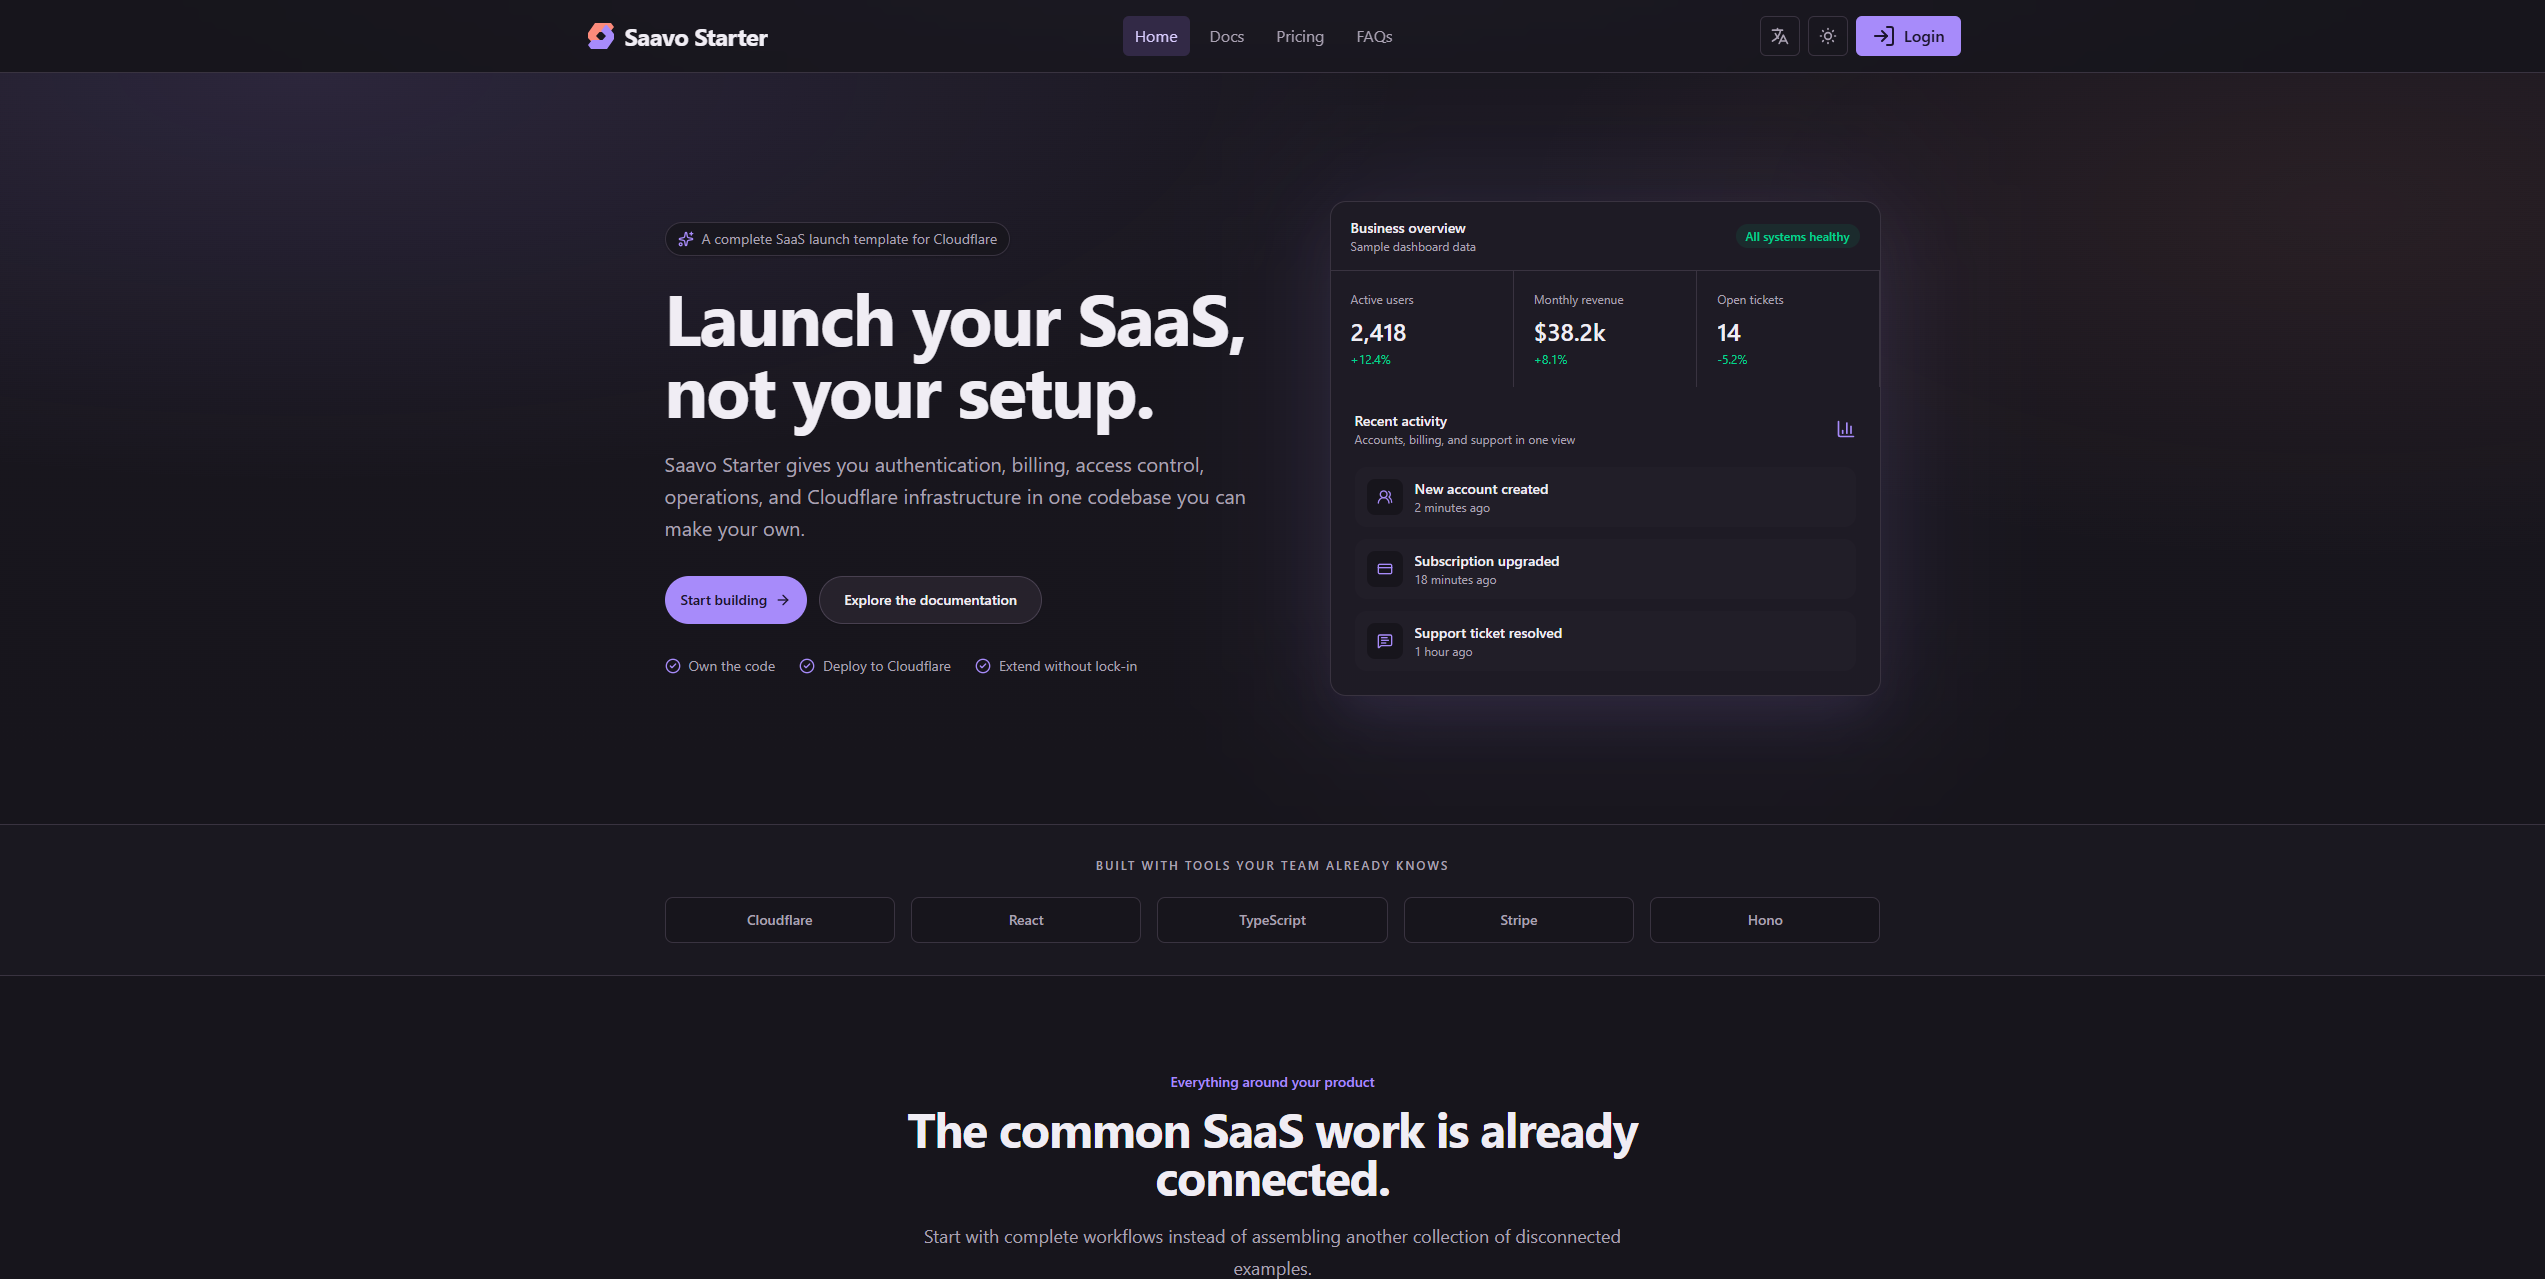
You should still see the default Saavo pages. Before migrating prototype code, resolve any template errors by following Run locally. Continue development once the base environment is working.
The initialization script has now generated a .env file. Do not commit its secrets to Git or copy them directly into other projects.
During local development, the template uses a local runtime to simulate databases and storage. External services such as email, Stripe, and third-party sign-in do not need to be configured yet. Add their credentials when you reach those features.
Being able to open the pages confirms that the project runs locally. It does not mean the external services have been configured.
Update the website copy
After initializing the template, leave theme styling and page content for later. First establish the website's domain, title, and description.
domain: webpagetopdf.dev
title: Webpage to PDF
description: Convert a URL to PDF online. Capture full webpages, customize PDF layouts, and hide unwanted content with a visual editor before exporting.
To initialize the content, run the project's included Agent in Codex with the following prompt. No manual edits are needed at this step:
Use $saavo-initialize-content with the following parameters:

{
  "domain": "webpagetopdf.dev",
  "title": "Webpage to PDF",
  "description": "Convert a URL to PDF online. Capture full webpages, customize PDF layouts, and hide unwanted content with a visual editor before exporting."
}
When it finishes, open config/base.ts and confirm that it has been updated to:
export const websiteBaseCfg = {
    siteName: {
        value: "Webpage to PDF",
        key: 'website.title',
    },

    siteDescription: {
        value: "Convert a URL to PDF online. Capture full webpages, customize PDF layouts, and hide unwanted content with a visual editor before exporting.",
        key: 'website.description',
    },

    siteOGImage: '',
    siteOGImageAlt: '',
    siteOGImageWidth: 1200,
    siteOGImageHeight: 630,

    twitterSite: '',
    twitterCreator: '',
    twitterImage: '',

    fbAppId: '',

    // Exact-match allowlist. The admin role is granted only after the application verifies
    // the address; these values intentionally bypass email aliases.
    adminEmails: ['admin@saavo.dev'],
    supportEmail: 'support@saavo.dev',
    fromEmailAddress: {
        name: "Webpage to PDF",
        email: 'send@mail.saavo.dev',
    },
}
Update the email settings as well:
export const websiteBaseCfg = {
    ...
    adminEmails: ['admin@webpagetopdf.dev'],
    supportEmail: 'support@webpagetopdf.dev',
    fromEmailAddress: {
        name: "Webpage to PDF",
        email: 'send@mail.webpagetopdf.dev',
    },
}
It is worth asking Codex to review the result again in case the Agent missed anything:
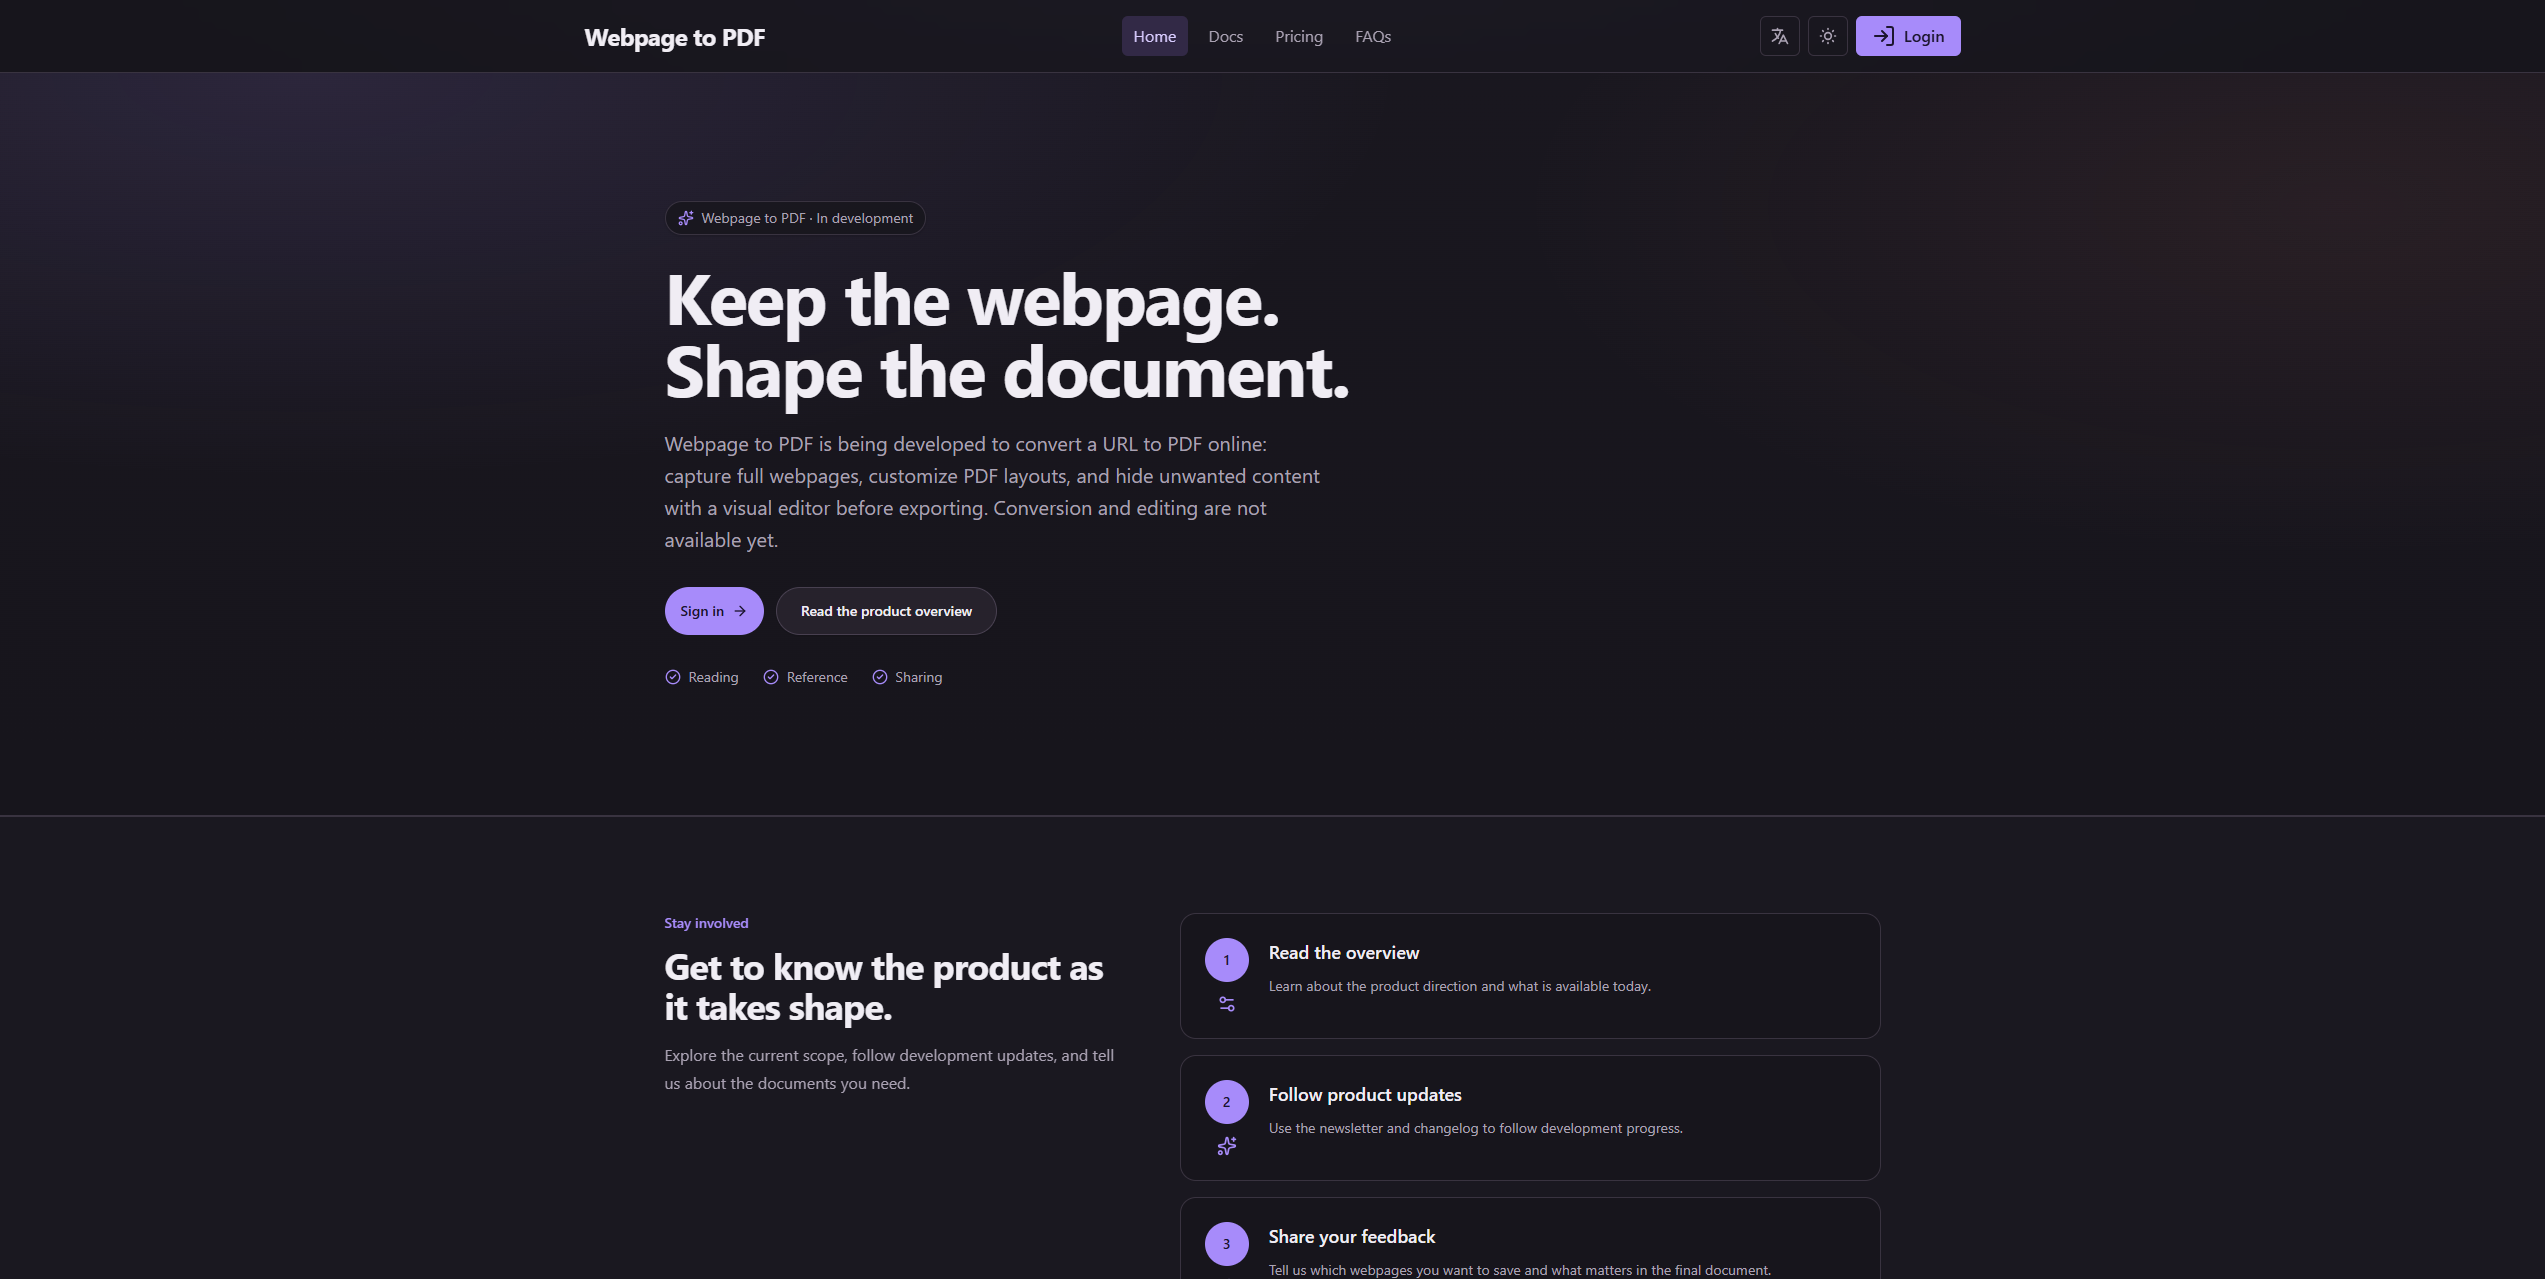
Independently review the website against the Webpage to PDF brief above and directly fix verified omissions, stale branding, inconsistent copy, translation issues, and unintended changes. Do not rely on previous reports or invoke the initialization skill. Avoid unrelated changes, run relevant checks, and briefly summarize the fixes and remaining issues.Once you have confirmed that everything is correct, run npm run dev again and confirm that the website information has changed.
Adjust the theme colors
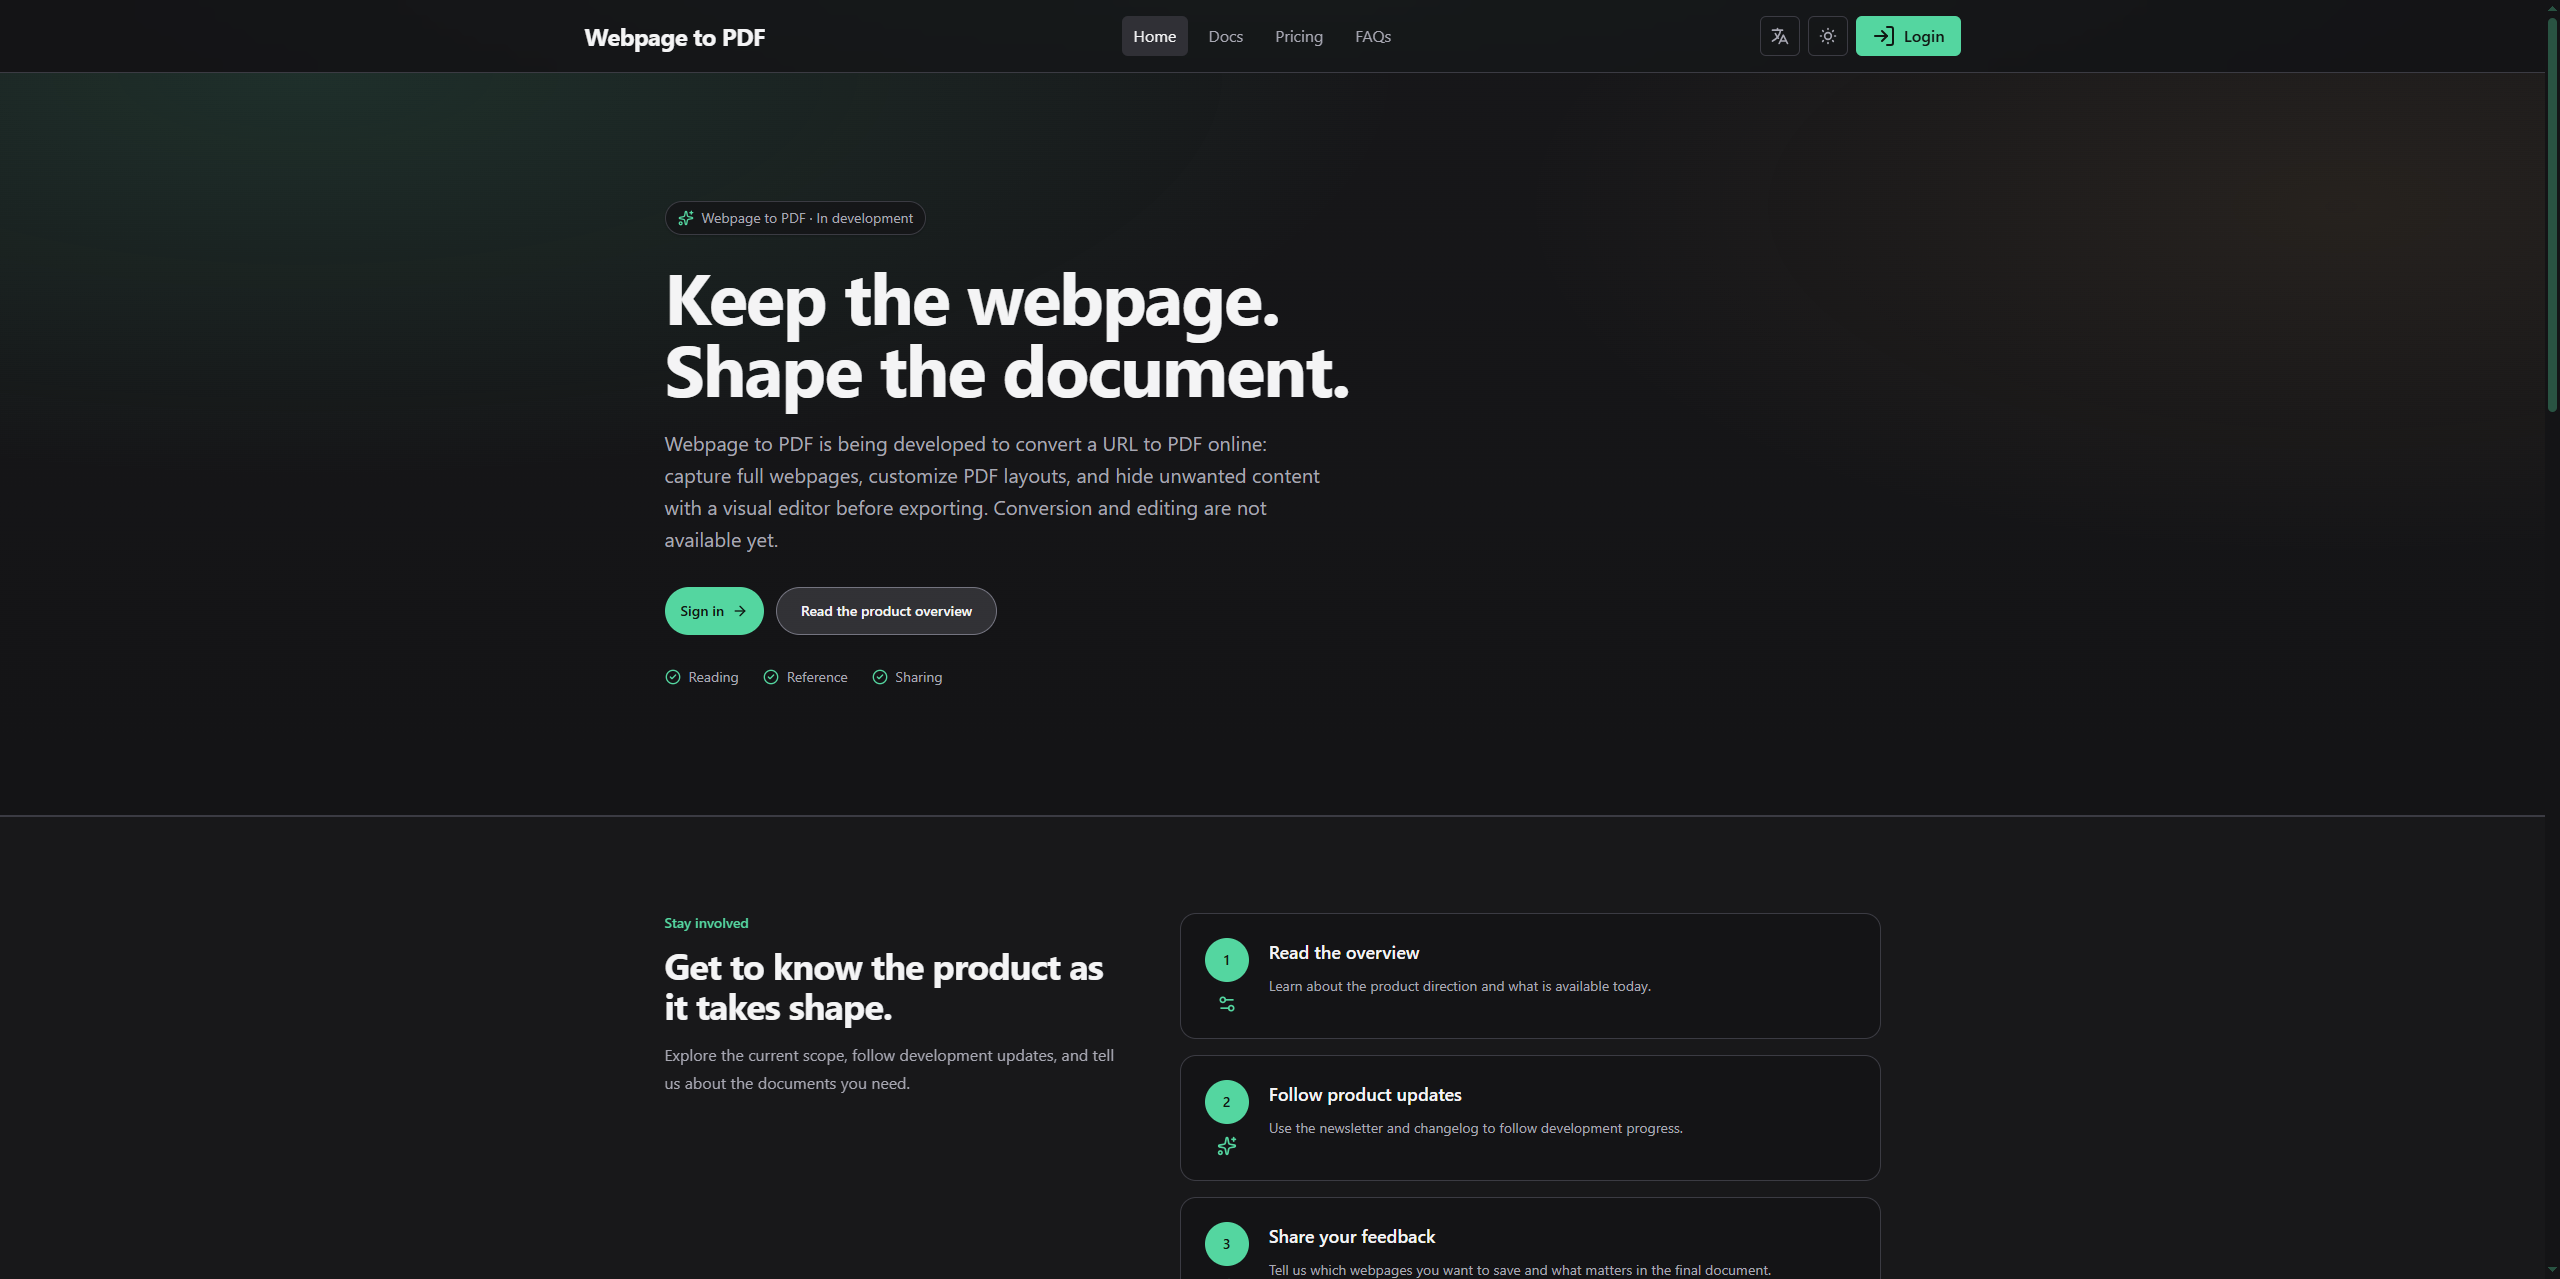
The initialization Agent has updated the website copy, but the theme still uses the default colors. Next, update those colors.
Theme colors only require changes to styles/base.css. You can ask Codex to make them instead of editing each value manually.
Open the earlier prototype project and ask Codex to extract its palette in this format:
Extract the current prototype’s color palette and fill in the CSS template below.

Requirements:
1. Prefer actual colors from the source code. If only screenshots are available, extract colors from them. Preserve the prototype’s brand identity and visual style.
2. If the prototype has no dark theme, create a neutral charcoal theme. Keep backgrounds, cards, and sidebars neutral; use brand colors mainly for buttons and accents.
3. Calculate contrast ratios: normal text, including secondary text, must achieve at least 4.5:1 against its intended background. Essential control boundaries and focus indicators must achieve at least 3:1 against adjacent colors. Adjust colors when necessary.
4. Replace only <HEX> and <SHADOW>. Preserve selectors, variable names, order, grouping, and all other settings. Use lowercase six-digit HEX colors and rgb(R G B / A) for shadow colors.
5. Output only the complete CSS. Do not omit variables, leave placeholders, or modify project files.

:root {
  color-scheme: light;
  --radius: 0.75rem;

  --background: <HEX>;
  --foreground: <HEX>;
  --card: <HEX>;
  --card-foreground: <HEX>;
  --popover: <HEX>;
  --popover-foreground: <HEX>;
  --primary: <HEX>;
  --primary-foreground: <HEX>;
  --secondary: <HEX>;
  --secondary-foreground: <HEX>;
  --muted: <HEX>;
  --muted-foreground: <HEX>;
  --accent: <HEX>;
  --accent-foreground: <HEX>;
  --destructive: <HEX>;
  --destructive-foreground: <HEX>;
  --border: <HEX>;
  --input: <HEX>;
  --ring: <HEX>;

  --brand-primary: <HEX>;
  --brand-primary-strong: <HEX>;
  --brand-warm: <HEX>;
  --brand-success: <HEX>;
  --brand-danger: <HEX>;
  --brand-info: <HEX>;
  --brand-from: <HEX>;
  --brand-to: <HEX>;

  --chart-1: <HEX>;
  --chart-2: <HEX>;
  --chart-3: <HEX>;
  --chart-4: <HEX>;
  --chart-5: <HEX>;

  --sidebar: <HEX>;
  --sidebar-foreground: <HEX>;
  --sidebar-primary: <HEX>;
  --sidebar-primary-foreground: <HEX>;
  --sidebar-accent: <HEX>;
  --sidebar-accent-foreground: <HEX>;
  --sidebar-border: <HEX>;
  --sidebar-ring: <HEX>;

  --shadow-xs-value: <SHADOW>;
  --shadow-sm-value: <SHADOW>;
  --shadow-md-value: <SHADOW>;
  --shadow-lg-value: <SHADOW>;
}

.dark {
  color-scheme: dark;

  --background: <HEX>;
  --foreground: <HEX>;
  --card: <HEX>;
  --card-foreground: <HEX>;
  --popover: <HEX>;
  --popover-foreground: <HEX>;
  --primary: <HEX>;
  --primary-foreground: <HEX>;
  --secondary: <HEX>;
  --secondary-foreground: <HEX>;
  --muted: <HEX>;
  --muted-foreground: <HEX>;
  --accent: <HEX>;
  --accent-foreground: <HEX>;
  --destructive: <HEX>;
  --destructive-foreground: <HEX>;
  --border: <HEX>;
  --input: <HEX>;
  --ring: <HEX>;

  --brand-primary: <HEX>;
  --brand-primary-strong: <HEX>;
  --brand-warm: <HEX>;
  --brand-success: <HEX>;
  --brand-danger: <HEX>;
  --brand-info: <HEX>;
  --brand-from: <HEX>;
  --brand-to: <HEX>;

  --chart-1: <HEX>;
  --chart-2: <HEX>;
  --chart-3: <HEX>;
  --chart-4: <HEX>;
  --chart-5: <HEX>;

  --sidebar: <HEX>;
  --sidebar-foreground: <HEX>;
  --sidebar-primary: <HEX>;
  --sidebar-primary-foreground: <HEX>;
  --sidebar-accent: <HEX>;
  --sidebar-accent-foreground: <HEX>;
  --sidebar-border: <HEX>;
  --sidebar-ring: <HEX>;

  --shadow-xs-value: <SHADOW>;
  --shadow-sm-value: <SHADOW>;
  --shadow-md-value: <SHADOW>;
  --shadow-lg-value: <SHADOW>;
}
Then add the extracted values to styles/base.css.
Checklist
By the end of this article, you should be able to open the project locally and confirm that the website copy, email settings, and theme colors have been updated.
Tutorial overview · Previous: Product design and prototype validation · Next: Migrate the PDF conversion features