Configure Google OAuth
Configure Google Auth Platform, create a web application client, and connect Google sign-in and One Tap to Saavo.
Saavo supports regular Google OAuth sign-in and optional Google One Tap. Both can use the same Web application Client ID, but their configuration requirements differ:
- Regular Google sign-in requires a complete Authorized redirect URI.
- Google One Tap also requires the current site in Authorized JavaScript origins and must be explicitly enabled in Saavo's configuration.
The template's regular sign-in flow requests only openid, email, and profile to identify the user and obtain their email address, name, and avatar. It does not request Gmail, Drive, or similar permissions.
Prepare the URLs
The default Google sign-in callback path is in config/deploy.ts:
ui: {
    oauthRedirectTo: {
        github: '/api/auth/oauth2/github',
        google: '/api/auth/oauth2/google',
    },
},
For WebpageToPDF, prepare:
| Environment | Authorized JavaScript origin | Authorized redirect URI |
|---|---|---|
| Local | http://127.0.0.1:5173 | http://127.0.0.1:5173/api/auth/oauth2/google |
| Initial deployment | https://<your-workers-dev-domain> | https://<your-workers-dev-domain>/api/auth/oauth2/google |
| Production domain | https://webpagetopdf.dev | https://webpagetopdf.dev/api/auth/oauth2/google |
A JavaScript origin contains only the protocol, hostname, and port, with no path. A redirect URI must include the full callback path. They are not interchangeable.
Run npm run dev first and use the local address shown in the terminal. If Vite changes ports, update both the local origin and redirect URI in Google Cloud. For production, use VITE_SITE_URL from .env.production.
Create a Google Cloud project
Open Google Auth Platform
Sign in to the Google Cloud Console and select an existing project at the top, or create a project specifically for WebpageToPDF sign-in. Then open Google Auth Platform.
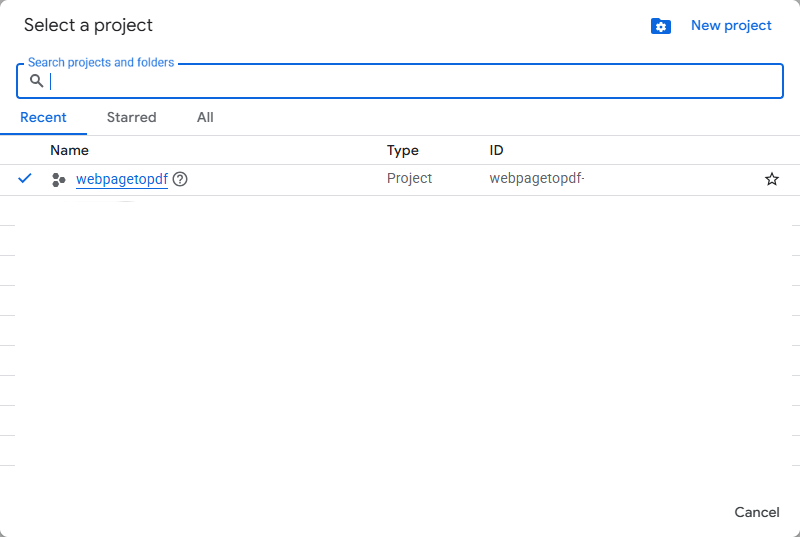
Do not reuse an old project without knowing its purpose. OAuth branding, audience, and client credentials belong to the current Google Cloud project. A Client ID created in the wrong project stays there too.
Create the OAuth consent screen
Click OAuth consent screen in the Google Cloud sidebar.
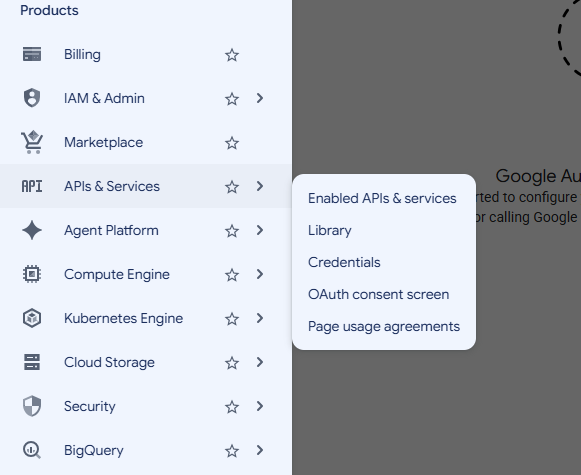
This opens the Google Auth Platform configuration page.
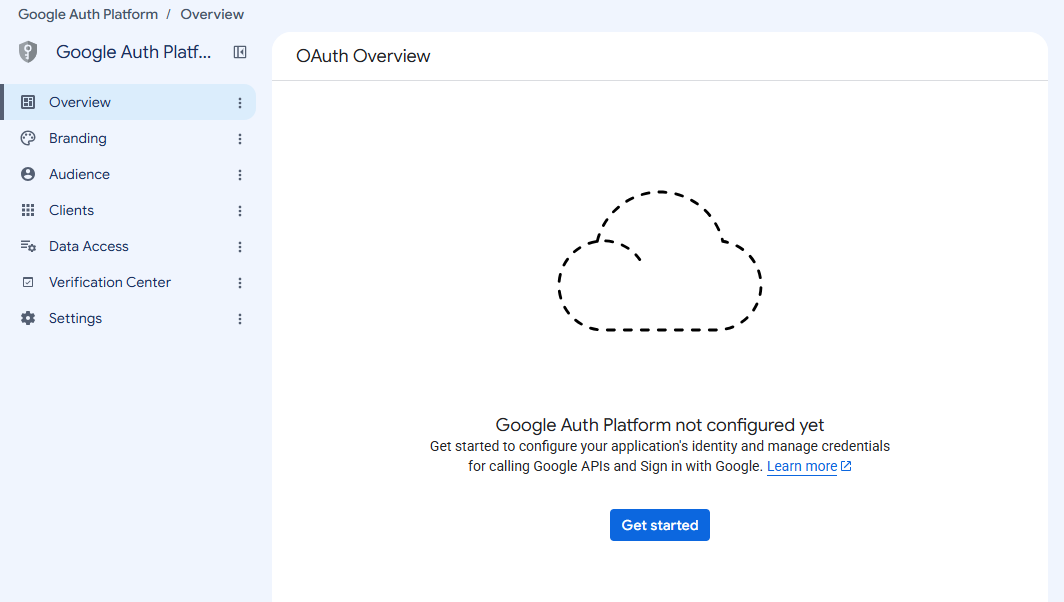
Click Get Started in the middle of the right-hand area to open the configuration details:
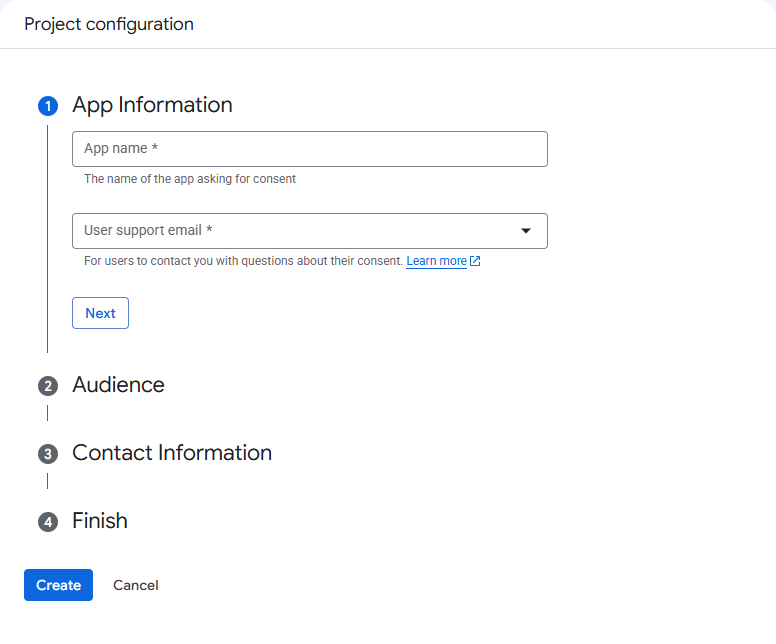
Enter the app name, choose an email address, and complete the other details, then continue.
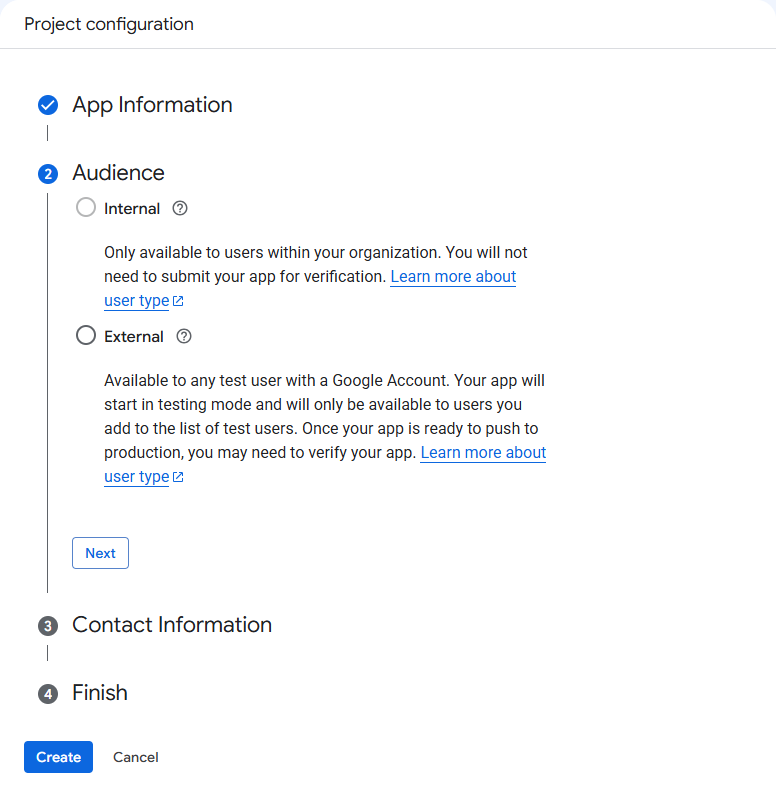
Select External and continue.
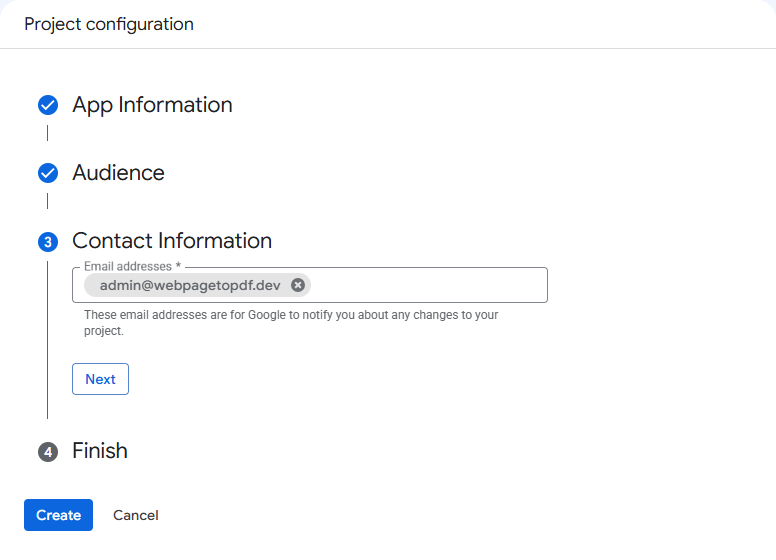
Enter contact information, continue to the next step, select the agreement checkbox, and click Create.
Configure Branding
After creation, you are redirected to Branding, where you can complete the app details.
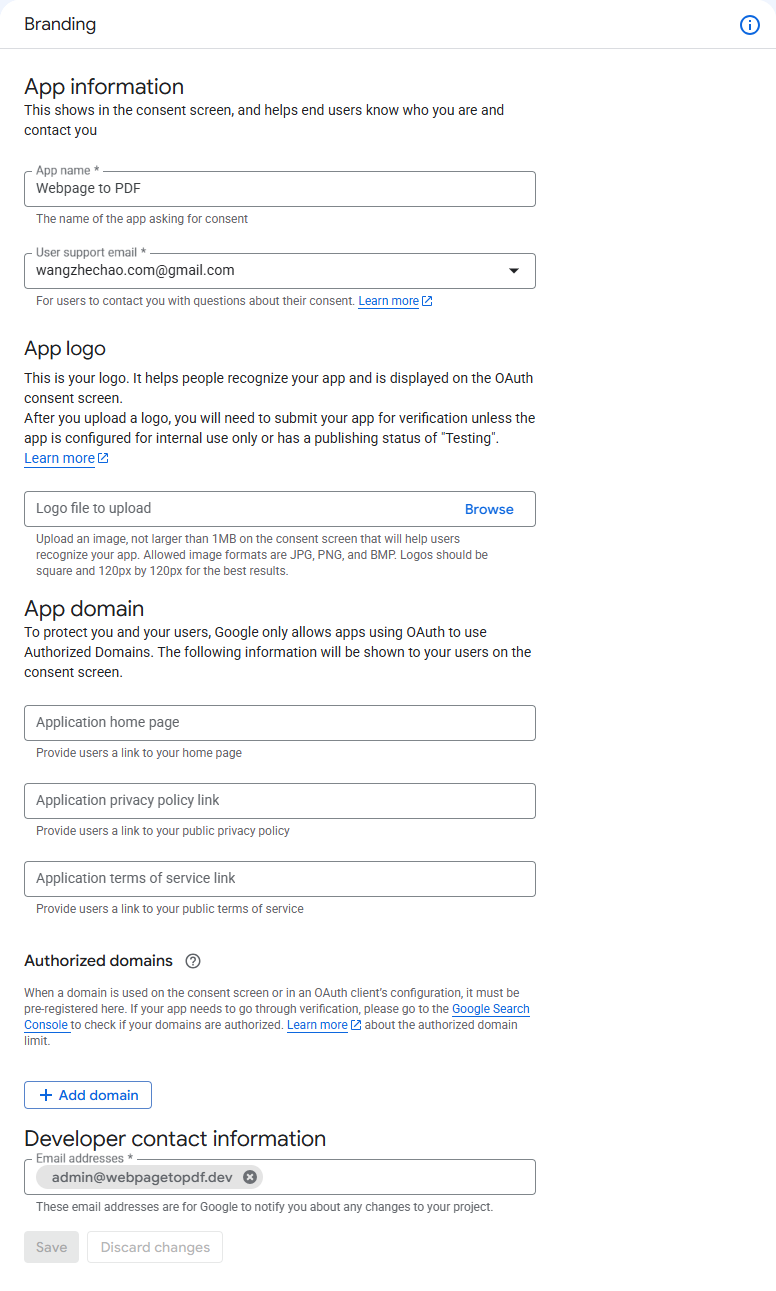
Authorized domains is required. I also recommend filling in the other options to improve the chances of approval.
Click Save when finished.
Google continues to adjust the Branding, Audience, and Data Access UI. See the Google Identity Services setup guide for current navigation and field meanings.
Create an OAuth client
Create a Web application client
Open Clients in Google Auth Platform:
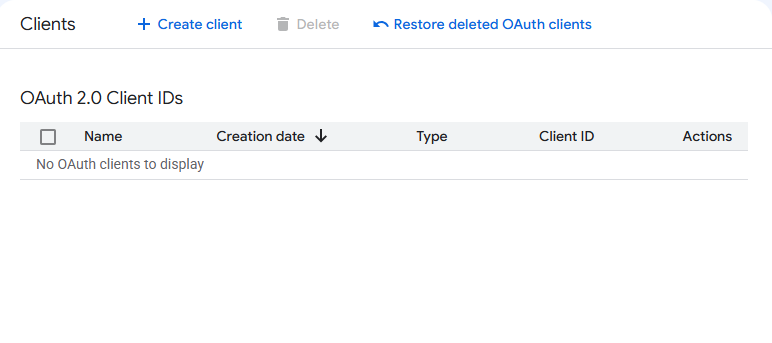
Click Create client and set Application type to Web application. You can use Webpage to PDF as the name.
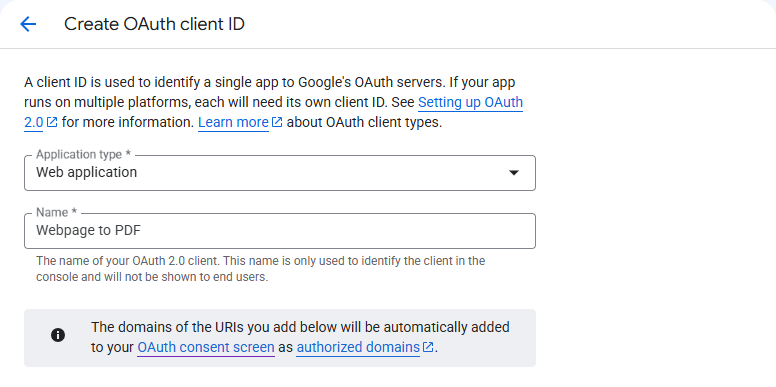
Do not choose Desktop app, Chrome extension, or another type. Saavo receives the callback on the website's server and requires a Web application client.
Add JavaScript origins
Under Authorized JavaScript origins, add the actual site origins where Google One Tap will appear, such as:
http://127.0.0.1:5173
https://webpagetopdf.dev
An origin has no trailing path and does not use wildcards.
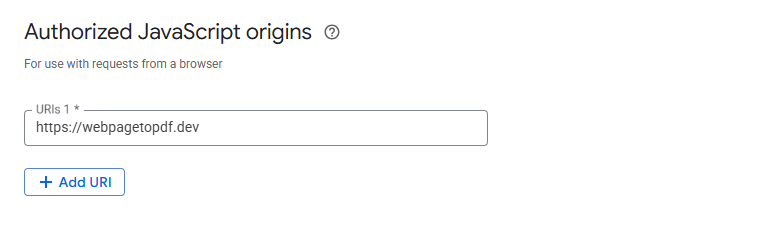
If you are not enabling One Tap yet, regular OAuth sign-in does not depend on these settings. We still recommend adding them when creating the client so they are ready when you enable One Tap.
Add redirect URIs
Under Authorized redirect URIs, add full callback URLs, such as:
http://127.0.0.1:5173/api/auth/oauth2/google
https://webpagetopdf.dev/api/auth/oauth2/google
If you still use a workers.dev address, add its full callback URL as well.
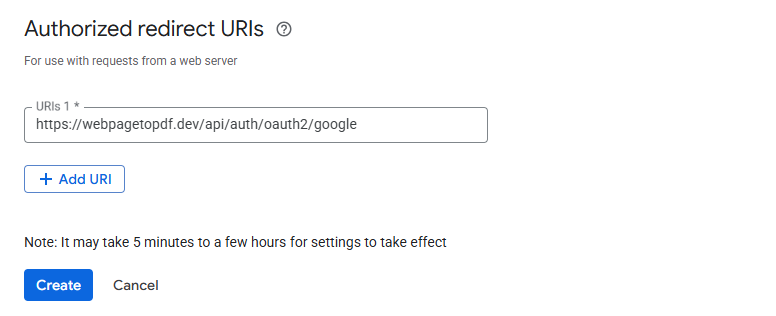
Google requires the request's redirect URI to exactly match a registered address, including http or https, hostname, port, letter case, path, and trailing slash.
Save the Client ID and Client Secret
Click Create, then immediately save the Client ID and Client Secret. The Client ID usually ends in .apps.googleusercontent.com.
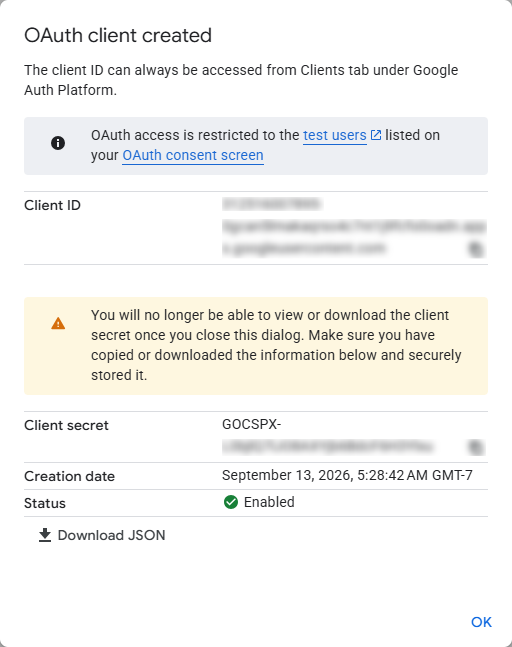
The Client Secret must remain in the server environment. Do not put it in frontend code or commit it to Git.
See Get your Google API client ID and Manage OAuth clients for Google's full requirements for Web application clients and URL formats.
Configure the local environment
In .env in the project root, enter:
GOOGLE_CLIENT_ID="Your Google Client ID"
GOOGLE_CLIENT_SECRET="Your Google Client Secret"
Save and restart the development server:
npm run doctor
npm run dev
The sign-in and sign-up pages enable Google sign-in when both credentials are present. A Client ID alone is not enough. Regular OAuth sign-in requires the server to exchange the authorization code using the Client Secret.
Configure production
After the initial deployment, enter the production credentials in .env.production:
GOOGLE_CLIENT_ID="Your production Google Client ID"
GOOGLE_CLIENT_SECRET="Your production Google Client Secret"
Then run:
npm run doctor:remote
npm run deploy:update
Deployment synchronizes the Client ID to Cloudflare as a Worker variable and the Client Secret as an encrypted secret. Do not change only the Cloudflare Dashboard. Saavo continues to use .env.production as the source of production settings.
If the initial deployment is not complete, you can leave the OAuth variables empty and run npm run deploy:init. Once you have the actual workers.dev address, add its origin and redirect URI to Google Cloud, fill in .env.production, and run npm run deploy:update.
When you switch to a custom domain later, complete all three steps:
- Add the new origin to Authorized JavaScript origins in Google Cloud.
- Add the new domain's full Google callback URL to Authorized redirect URIs.
- Confirm that
VITE_SITE_URLin.env.productionuses the new origin, then redeploy.
Decide whether to enable Google One Tap
Once regular Google sign-in is configured, users can start Google authorization from the sign-in or sign-up page. One Tap is an additional feature, disabled by default:
auth: {
    enableGoogleOneTap: false,
},
To enable it, change the configuration to:
auth: {
    enableGoogleOneTap: true,
},
Before enabling it, confirm that the current page's origin is registered under Google Cloud's Authorized JavaScript origins. Production must use HTTPS. Local development can use http://localhost or a loopback address. After saving, restart npm run dev locally or run npm run deploy:update for production.
Browser privacy settings, third-party cookie policies, FedCM settings, or extensions may block One Tap. Regular Google sign-in on the sign-in page should still work if One Tap does not appear. Do not make the One Tap prompt your only acceptance check.
Verify Google sign-in
Complete at least these checks:
- Open the sign-in page and confirm that the Google option appears.
- Click it and confirm that Google shows the correct app name and requested permissions.
- Approve sign-in and confirm that the browser returns to Saavo with an authenticated session.
- Sign out, then sign in again with the same Google account and confirm that no duplicate user is created.
- Test new-user registration with another Google account allowed to access the app.
- If One Tap is enabled, test its prompt separately in a browser signed in to Google but not to your site.
Local development, workers.dev, and the production domain use different origins. Complete a full test at least on the domain you will ultimately make available to users.