Create a project
Authorize the CLI with your Saavo account, download a template, and automatically prepare the local development environment.
Open your Saavo account page and confirm that Saavo Starter and the currently available template versions appear under "My Products." This page shows the access your account actually has. Use the same account when authorizing the CLI.
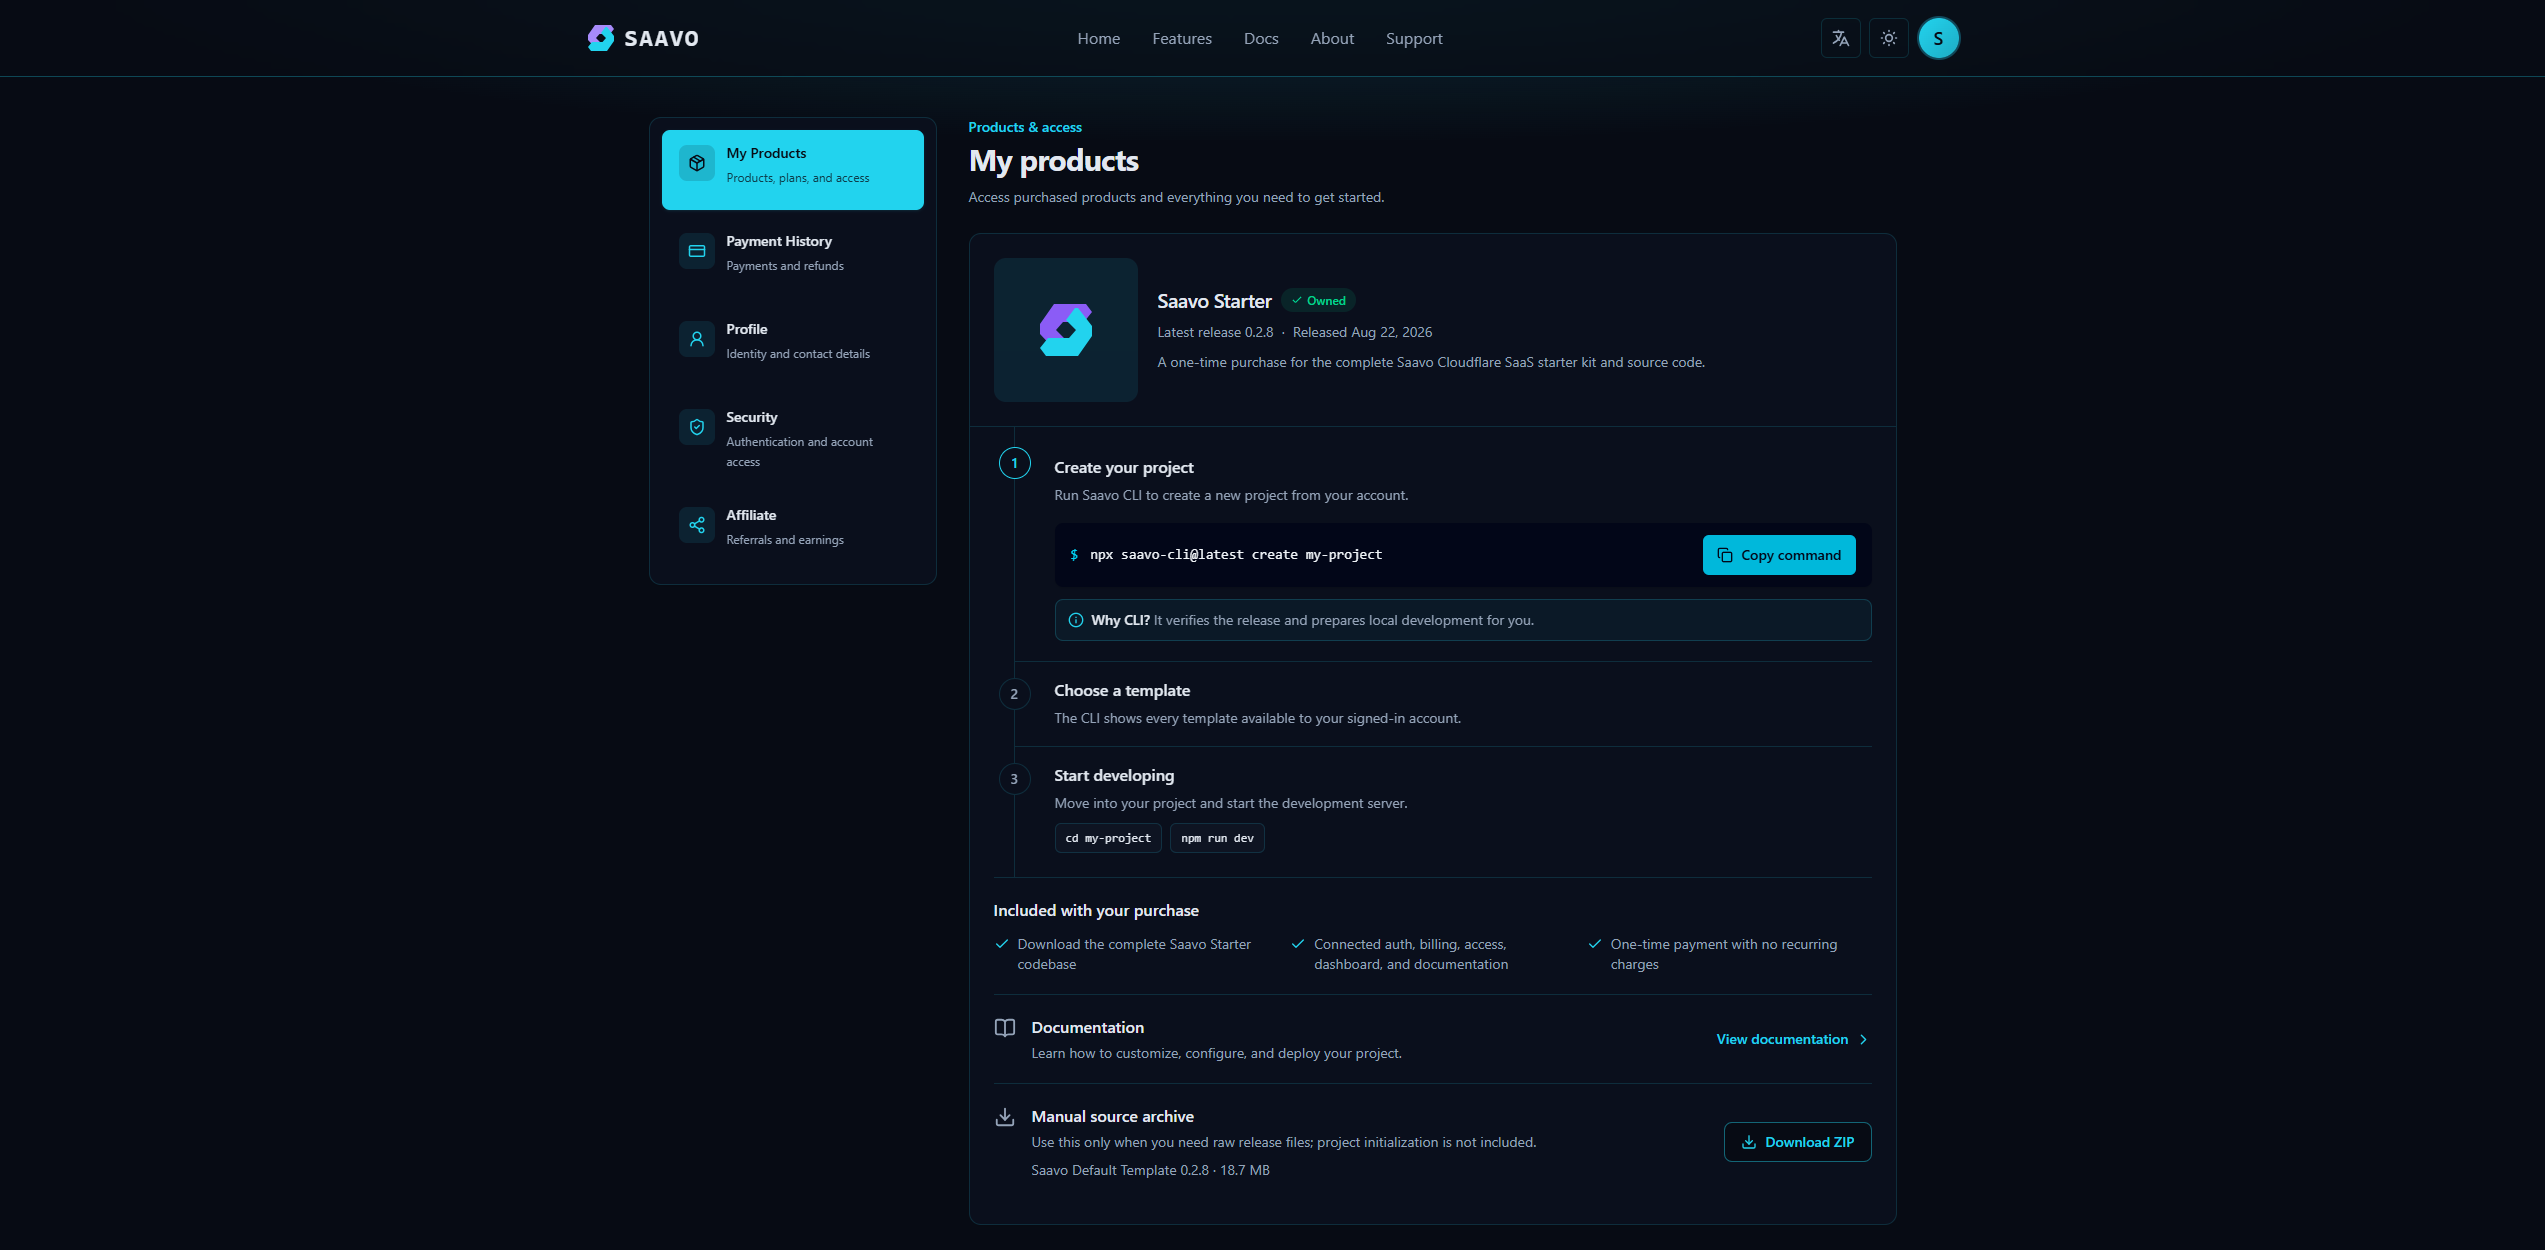
The ZIP on the account page is useful when you need to inspect the original release files. For normal project creation, we recommend Saavo CLI. It verifies the download, names the project, and initializes the local environment, making it more convenient than downloading the ZIP manually.
Run the create command
Before running commands, make sure Node.js and npm are installed. See Prerequisites for details.
Open a terminal, navigate to the parent directory where you want to store the project, and run:
npx saavo-cli@latest create my-projectOn first use, the CLI opens saavo.dev in your browser. Sign in with the account that has template access, review the authorization request, and allow access.
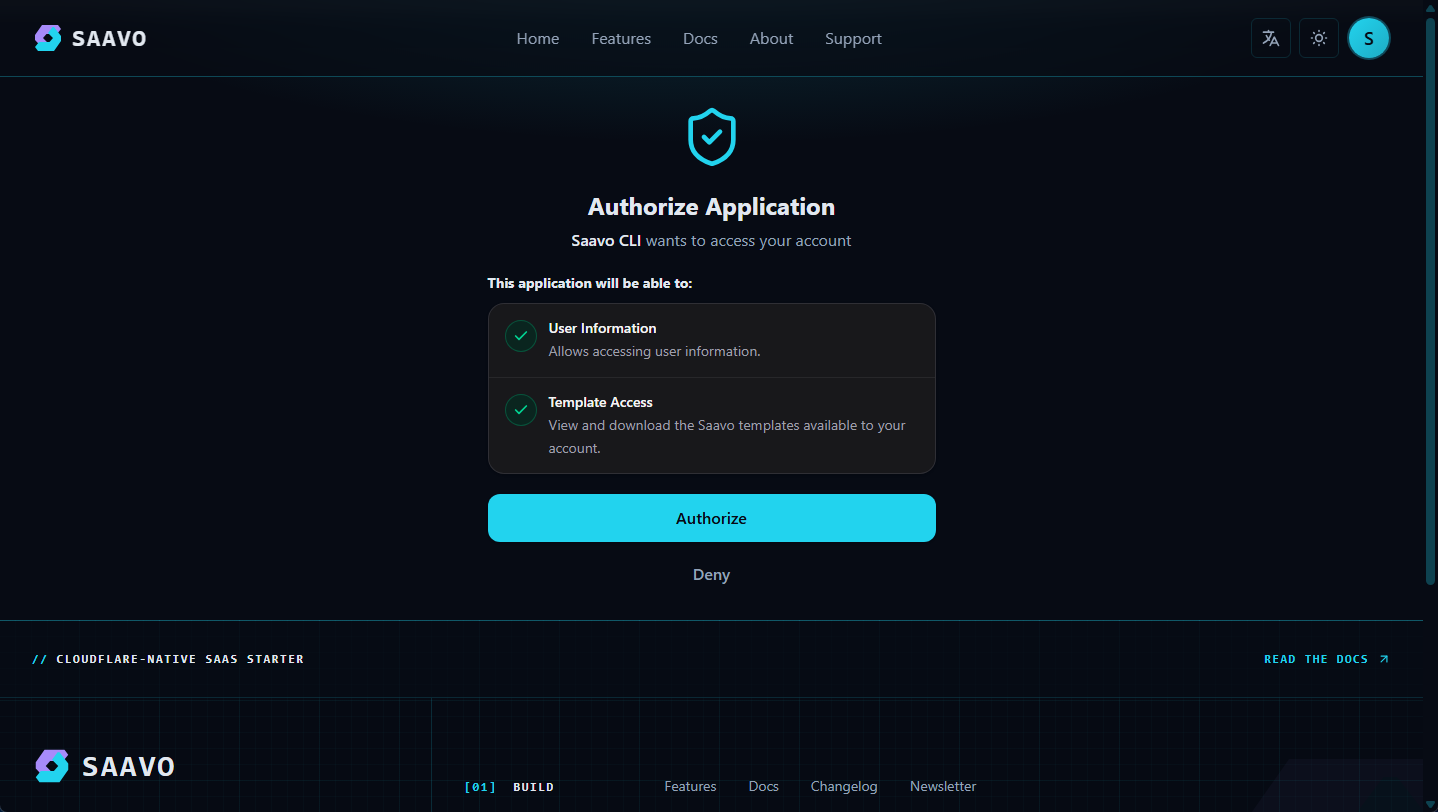
Return to the terminal after authorization. The CLI continues checking Node.js, npm, and template access. You do not need to copy a token or download URL. If you have not purchased the Saavo Starter template, you will see:
◆  Logged in as saavo (xxx@xxx.com).
│
■  SAAVO CLI FAILED
│  No templates are available for saavo (xxx@xxx.com). The account may not have template access, or no release has been published.
Confirm that you have template access before authorizing the CLI. Without it, you cannot create a project.
Replace my-project with your own project name. Use lowercase English letters, numbers, and hyphens, and avoid a name already used by an existing project.
Choose local initialization
If the download and verification succeed, the terminal asks:
Prepare the project for local development?
Installs dependencies, creates .env, and initializes local databases.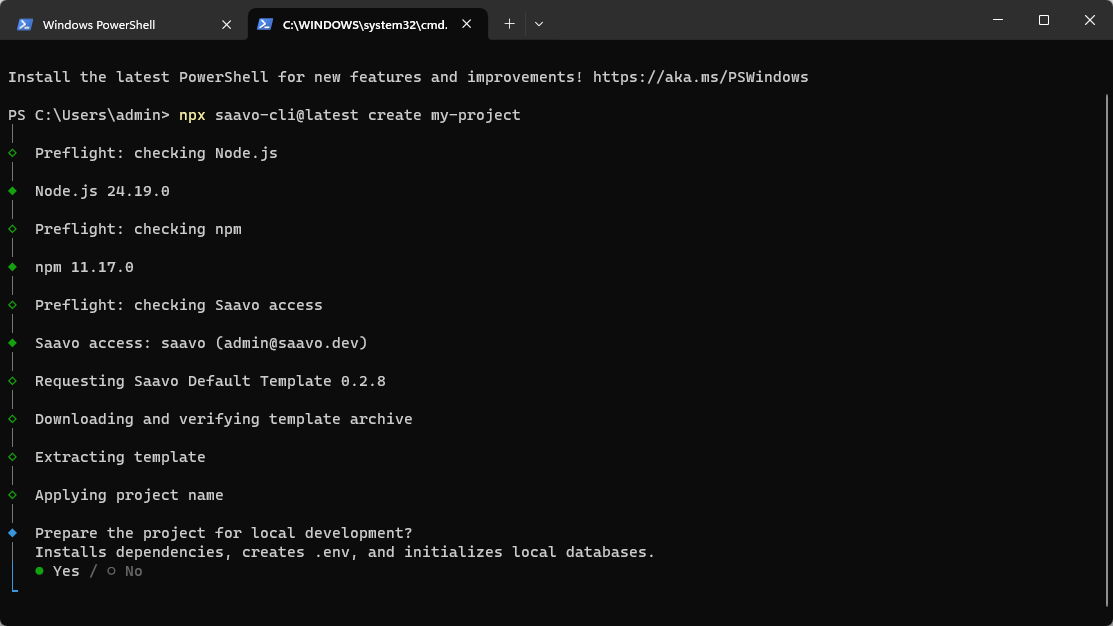
Choose Yes. The CLI then:
- Installs dependencies with
npm ciornpm install. - Calls
npm run saavo:initin the template. - Creates the local
.envfromexample.vars. - Generates a
SAAS_SECRETunique to this project. - Generates Cloudflare types.
- Generates documentation and blog collections and their types.
- Initializes the local D1 databases and applies migrations.
- Runs
doctorto check local settings.
This may take some time. When it finishes, you will see the next steps:
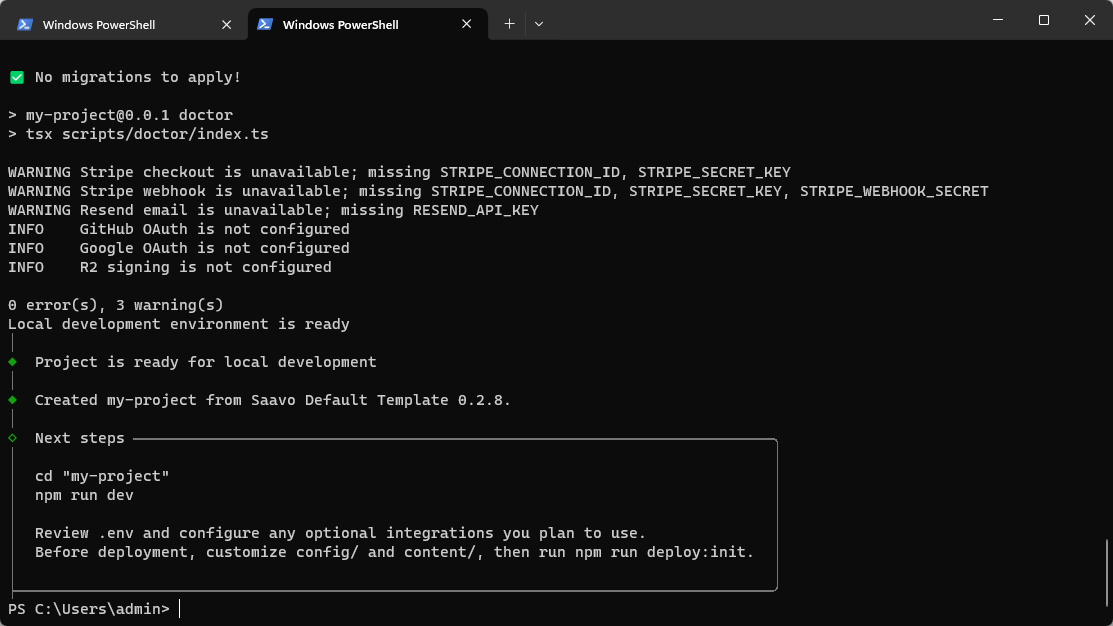
You do not need to copy example.vars manually or execute D1 SQL statements individually. .env already retains Cloudflare's official Turnstile test keys. Unused Stripe, OAuth, notification, and R2 API credentials can remain empty.
Do not commit the local environment file
.env is already ignored by Git. Do not commit its SAAS_SECRET or copy it to other projects. During deployment, deploy:init writes the same application key to .env.production, which is also ignored.
If you skipped initialization
The project files are still available. Enter the project directory and run:
npm install
npm run saavo:init
Wait for Local development environment is ready before continuing. Use these commands to recover if initialization fails midway as well. Do not revert to the old manual database creation process.
Next: Run locally.