串接 Stripe 付款
設定 Stripe 產品、價格和 Webhook,串接購買流程與使用權益授予。
上一篇已定義方案和使用權益,並實作使用限制。這篇會設定 Stripe,讓購買、付款通知和使用權益授予成為完整流程。
串接付款系統
前面已完成 products.ts 的產品設定,現在要串接實際的付款系統。
這裡以 Stripe 為例,假設你已完成註冊並取得收款權限。第一次串接時,建議先在測試模式確認 Checkout 和 Webhook 都能正常運作,再切換到正式模式。兩個環境各自使用不同的商品、Price ID 和金鑰,不能混用。
建立產品
接著可以請 AI 產生網站 Logo。我通常直接將商品圖片設為網站 Logo,也可以依 products.ts 的產品設定,另外產生商品圖片。
再請 AI 根據設定產生對應名稱和描述,方便在 Stripe 新增產品。以下是我的提示詞:
我要將產品發布到 Stripe,請幫我產生對應的 name 和 description,也要包含點數包。
AI 產生了以下表格:
| 產品 | Name | Description |
|---|---|---|
| Pro 會員 | Webpage to PDF Pro | Get 60 minutes of webpage conversion time every day across Quick Convert, Custom, and Visual Editor, plus 500 API conversion credits each month. Failed conversions do not use your allowance. |
| 500 點數包 | Webpage to PDF API Credits — 500 | 500 prepaid credits for successful API conversions. One successful conversion uses one credit. Purchased credits do not expire, and failed conversions do not use credits. |
| 2,000 點數包 | Webpage to PDF API Credits — 2,000 | 2,000 prepaid credits for successful API conversions. One successful conversion uses one credit. Purchased credits do not expire, and failed conversions do not use credits. |
| 10,000 點數包 | Webpage to PDF API Credits — 10,000 | 10,000 prepaid credits for successful API conversions. One successful conversion uses one credit. Purchased credits do not expire, and failed conversions do not use credits. |
雖然首版不會在網站顯示點數包,但可以先在 Stripe 建立商品,等 API 功能開放後,再啟用對應方案。
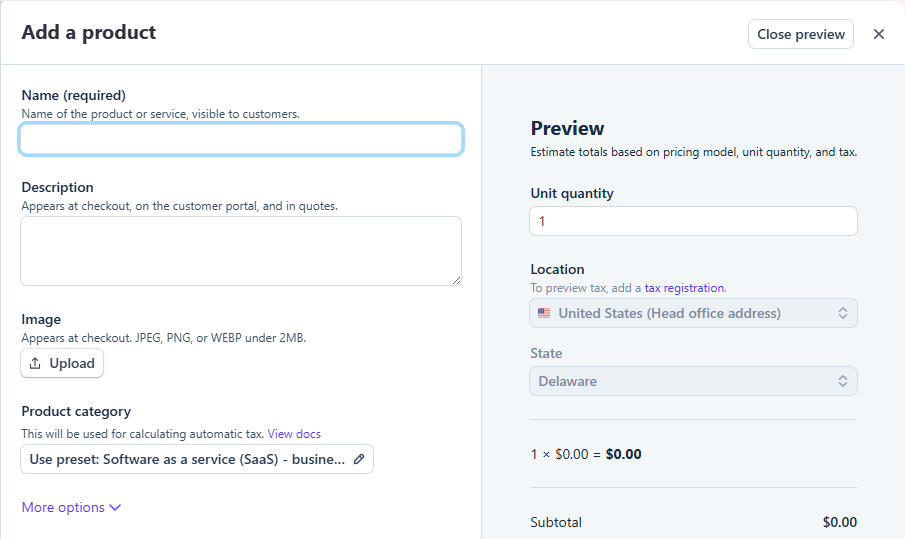
開啟 Stripe 的 Product catalog 頁面,按下右上角的 Create product,將上表內容填入對應欄位,再按下 Add product 完成建立。
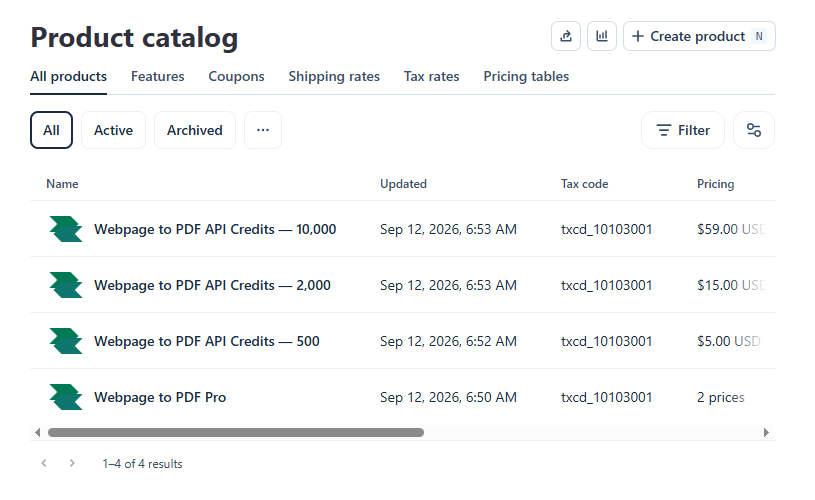
完成後的產品清單如下:
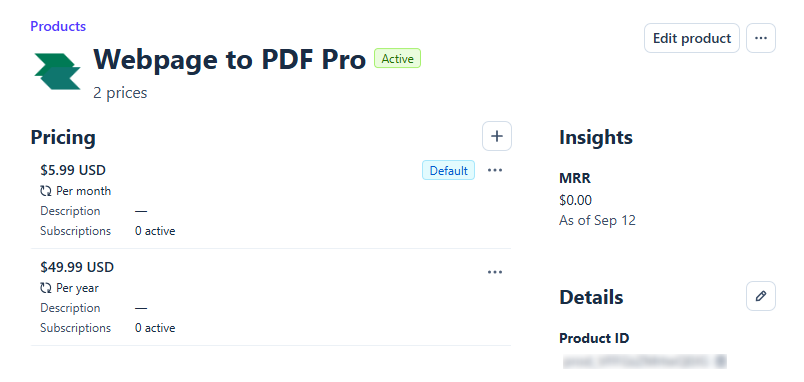
接著將產品和點數包對應的 Price ID 填入 config/products.ts。以 Pro 會員為例,按下剛才建立的 Pro 會員產品,就能在頁面看到 Pricing 清單:
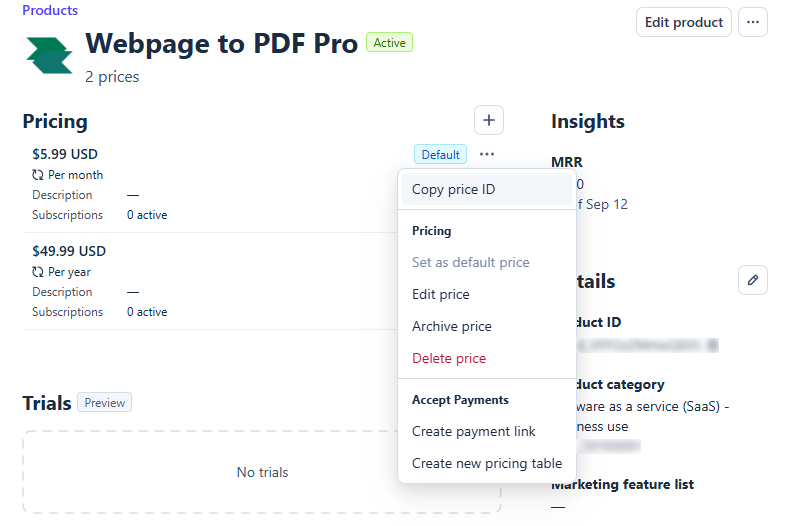
可以按下清單項目查看詳細資訊,或開啟右側操作選單,選擇 Copy price ID,複製對應的 Price ID。
依上述步驟補齊 config/products.ts。重點是替換 priceId 欄位,每個方案都要填入對應的 Price ID。Pro 月繳和年繳各自使用不同的 Price ID,不要混用,否則付款系統無法正確扣款。
設定 Webhook
Stripe 的 Webhook 能在使用者付款成功後通知我們。系統會依通知更新資料庫的訂單狀態,以及對應的使用權益與額度。
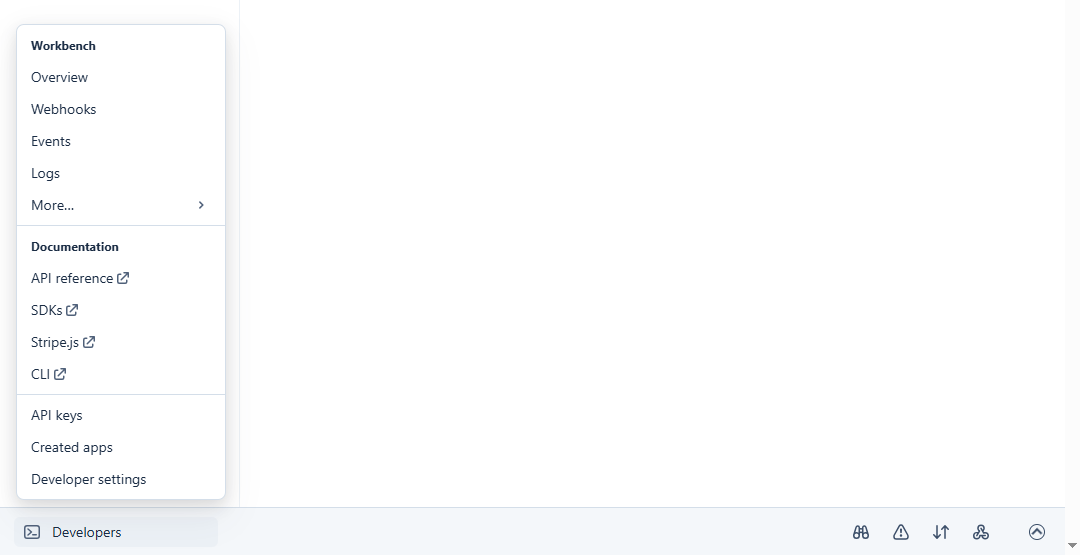
設定步驟很簡單。先在 Stripe 後台頁面下方按下 Developers:
選擇 Webhooks 面板:
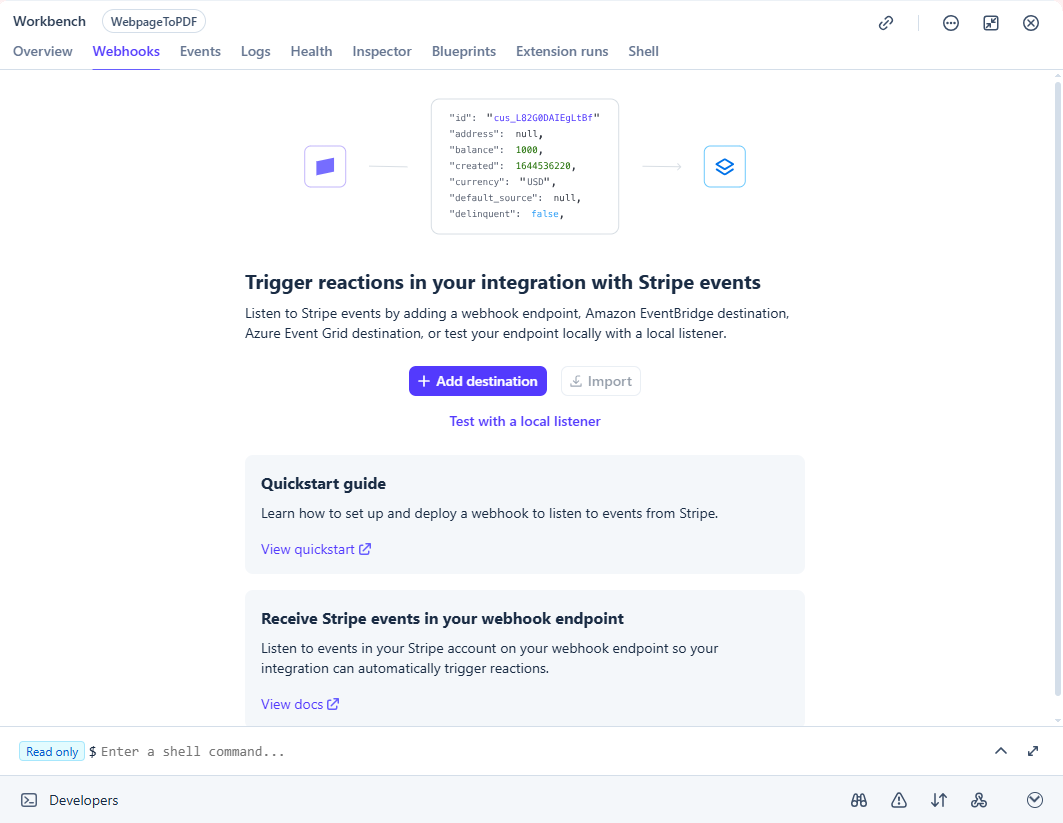
按下頁面中央的 Add destination,進入 Create an event destination 頁面:
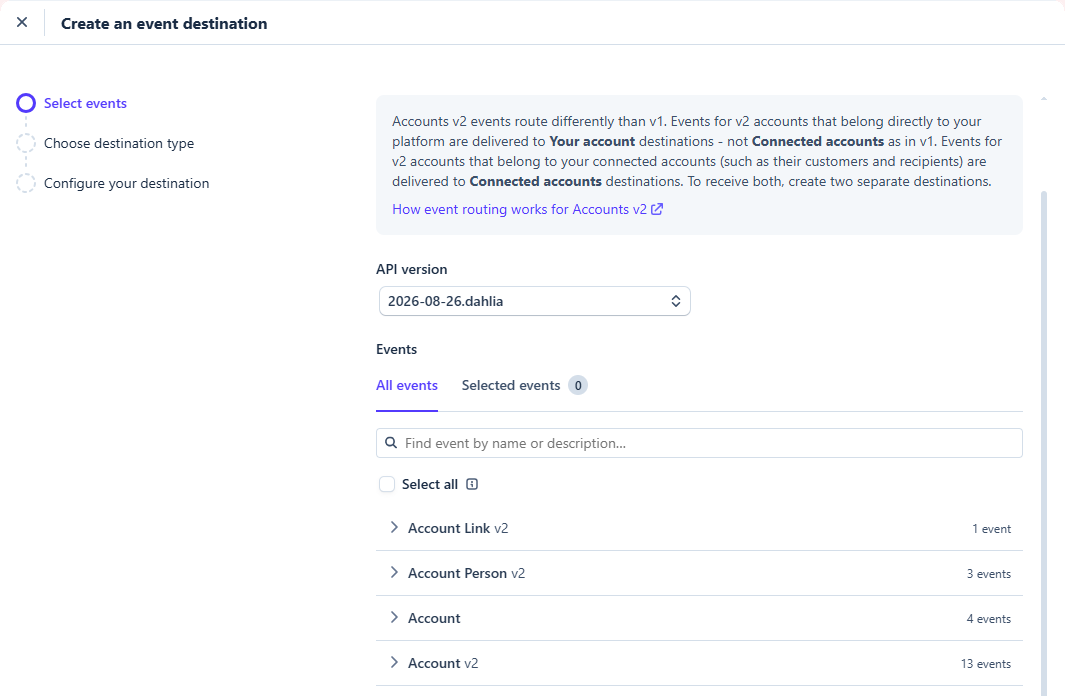
接著選擇網站需要接收的事件。目前 Saavo 專案使用以下事件:
checkout.session.completed
checkout.session.async_payment_succeeded
checkout.session.async_payment_failed
checkout.session.expired
customer.subscription.created
customer.subscription.updated
customer.subscription.paused
customer.subscription.resumed
customer.subscription.deleted
invoice.finalized
invoice.finalization_failed
invoice.paid
invoice.payment_failed
invoice.payment_action_required
invoice.marked_uncollectible
invoice.voided
refund.created
refund.updated
refund.failed
共 19 個事件:
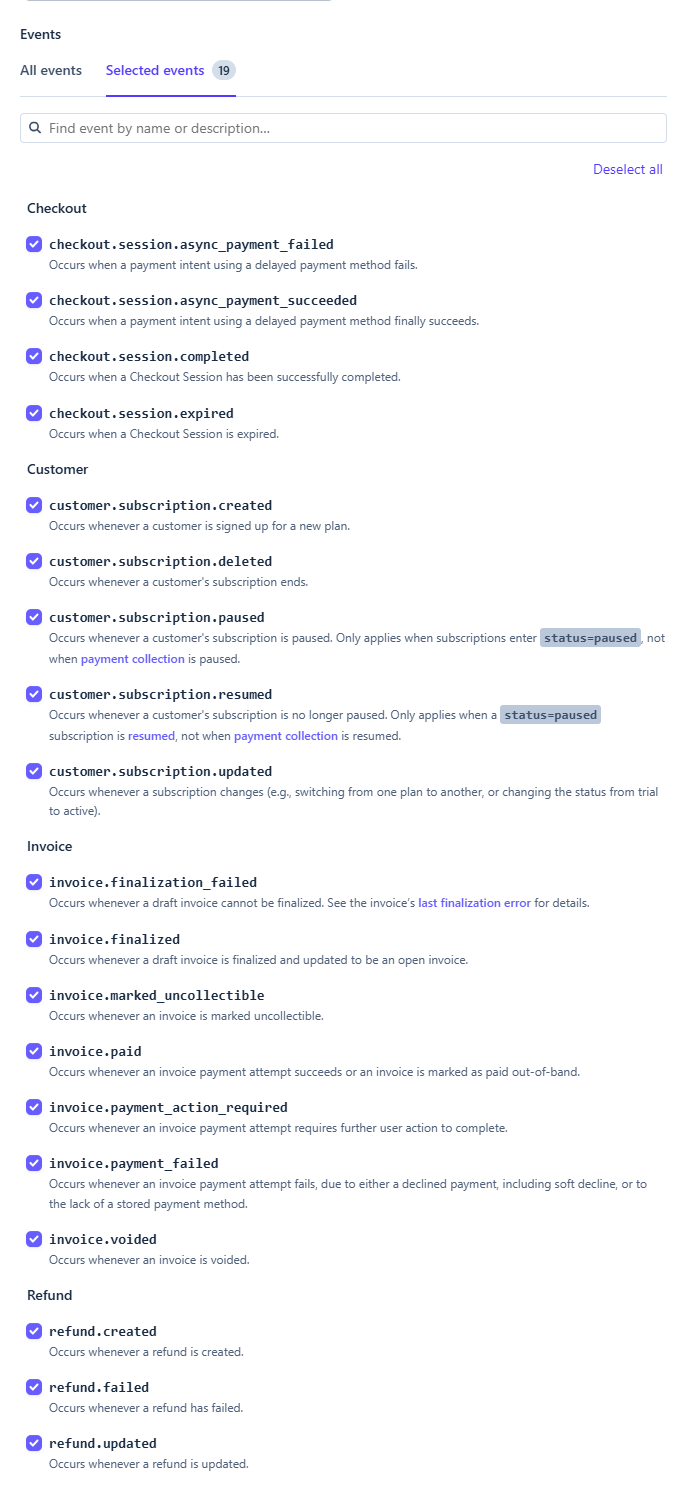
按下 Continue,在新頁面選擇 Webhook endpoint 類型。確認後,依頁面提示填寫表單並完成建立。
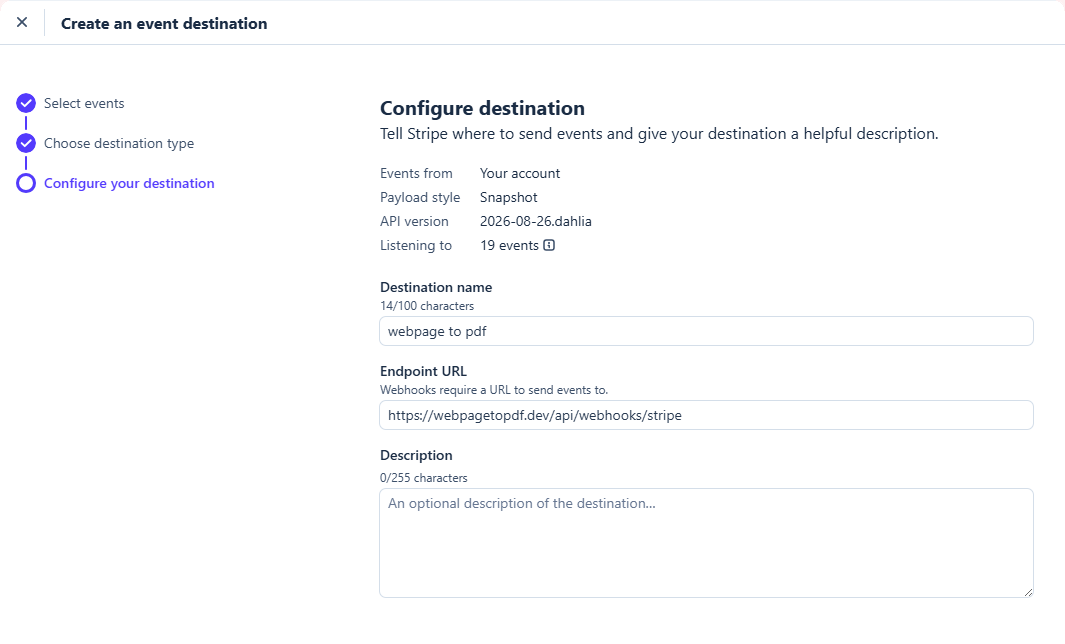
將金鑰儲存在本機
建立 Webhook 後,Stripe 會產生以 whsec_ 開頭的 Webhook Secret,需要存入本機的環境變數檔案。
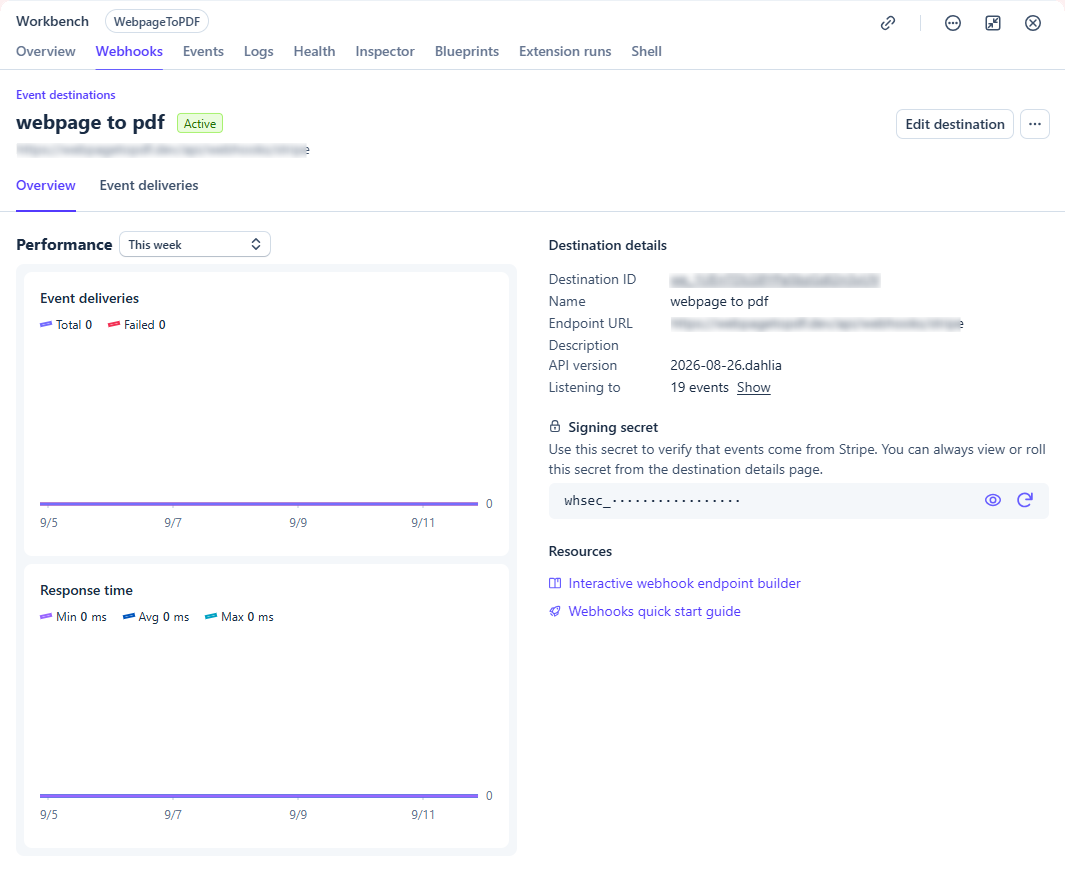
複製後,存入專案根目錄的 .env.production:
STRIPE_WEBHOOK_SECRET="whsec_xxxxxxxxxxxxxxxxxxxxxx"如果找不到 .env.production,可以自行建立,不影響後續使用。
除了 Webhook 金鑰,也要將 Stripe 連線 ID 和 Secret Key 存入環境變數檔案。
STRIPE_CONNECTION_ID="webpage_to_pdf"
STRIPE_SECRET_KEY="sk_live_xxxxxxxxxxxxxxxxxxxxxx"
STRIPE_SECRET_KEY 可在 Stripe 後台取得,正式金鑰以 sk_live_ 開頭。
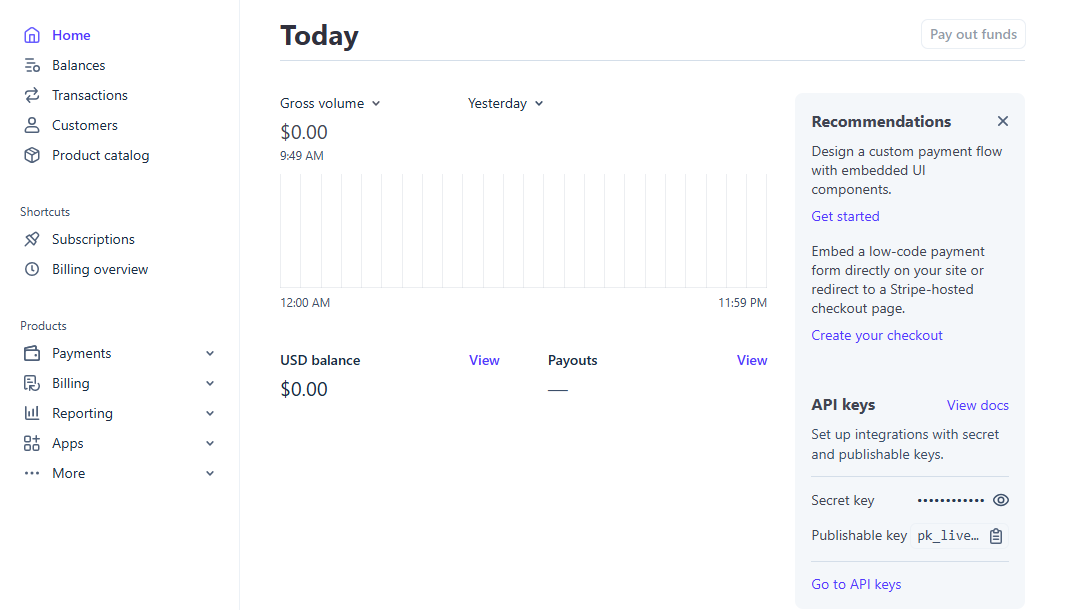
STRIPE_CONNECTION_ID 則是自行定義的連線 ID,用來區分不同付款連線。
使用指令碼快速設定
前面示範的是手動建立方式,也可以使用專案指令碼快速設定 Webhook。指令碼不會代為申請 Stripe 金鑰,只會取代「設定 Webhook」一節的後台操作。
使用前先執行 npm run,確認專案包含這些指令。舊範本可能需要同時更新指令碼入口和實作,請參閱專案指令。
正式環境執行 npm run webhook:stripe:prod,開發環境執行 npm run webhook:stripe:dev。以下示範開發環境的設定流程。
執行前,需先設定對應環境的 STRIPE_SECRET_KEY,否則指令碼會報錯:
C:\code\webpagetopdf>npm run webhook:stripe:dev

> webpagetopdf@0.0.1 webhook:stripe:dev
> tsx scripts/stripe/setup.ts development

Webhook site origin [http://127.0.0.1:5173]: https://7c7d-2605-52c0-2-1ebf-be24-11ff-fe62-cadd.ngrok-free.app
✔ Select the webhook event API version 2026-08-26.dahlia (project default)
✔ Select Stripe events checkout.session.completed, checkout.session.async_payment_succeeded, checkout.session.async_payment_failed, checkout.session.expired, customer.subscription.created, customer.subscription.updated, customer.subscription.paused, customer.subscription.resumed, customer.subscription.deleted, invoice.finalized, invoice.finalization_failed, invoice.paid, invoice.payment_failed, invoice.payment_action_required, invoice.marked_uncollectible, invoice.voided, refund.created, refund.updated, refund.failed
Environment: development
Destination: https://7c7d-2605-52c0-2-1ebf-be24-11ff-fe62-cadd.ngrok-free.app/api/webhooks/stripe
Webhook API version: 2026-08-26.dahlia
Selected events: 19
Create this Stripe webhook destination? [Y/n]:
Stripe webhook destination created: we_1UEnlFLG8YPa5bzGMCs1REYC
Configuration file: C:\code\webpagetopdf\.env
The new signing secret was saved without being printed.
Restart the development server if the signing secret changed.
完成付款邏輯
Saavo 已處理付款相關的底層邏輯,這裡不需要自行呼叫 Stripe SDK。只需依 products.ts 的產品與方案設定,串接 Pricing 頁面和購買入口。
整體流程如下:
- Pricing 頁面讀取產品與方案設定。使用者按下購買後,將
productId和planId提交到/api/payments/checkout/:productId/:planId。 - 後端依這兩個參數重新讀取方案設定,檢查是否已登入、方案是否存在、是否允許重複購買,再使用方案的
priceId建立 Stripe Checkout Session。 - API 回傳 Stripe Checkout 網址,前端前往該網址完成付款。
- 發生付款、退款或訂閱狀態異動時,Stripe 會傳送 Webhook 到
/api/webhooks/stripe。後端以STRIPE_WEBHOOK_SECRET驗證簽章,再更新訂單、交易、訂閱與退款記錄。 - 系統依 Stripe 回傳的 Price ID,找到
products.ts對應方案,再讀取access.roles和access.entitlements。 - 一次性付款成功後會觸發
payment_succeeded。訂閱建立、更新或終止時,也會觸發對應事件,自動更新角色與使用權益。
請注意,不能依前端是否成功重新導向判斷付款結果。使用者可能中途關閉頁面,也可能自行構造請求,最終付款狀態需以 Stripe Webhook 為準。
Saavo 已處理 Webhook 事件的儲存和重複事件。若某次處理失敗,API 會回傳失敗狀態,Stripe 之後會繼續重試。我們主要需要調整的是前端 UI,包括方案呈現、呼叫 Checkout API、處理登入狀態與 API 錯誤等。
訂單、訂閱、角色與使用權益,都交由後端 Webhook 更新,前端不要自行修改,避免資料不一致。
可以將 Pricing 頁面與購買入口交給 AI,請它依目前的 products.ts 設定完成。
本篇檢查
完成本篇後,應在測試模式確認購買、Webhook 回呼和使用權益授予都正常,再準備正式環境對應的設定。